Intuit QuickBooks backup and recovery
Scope and prerequisites
This guide provides detailed instructions on how to back up and recover Intuit QuickBooks company data with the help of Infrascale Cloud Backup.
Before you begin, please review the prerequisites:
Infrascale Cloud Backup account
Online Backup and Recovery Manager (OBRM)
QuickBooks Desktop
These instructions use QuickBooks Desktop for Windows and OBRM for Windows in the examples. If you use macOS, routine may differ somewhat.
QuickBooks company data backup
To back up QuickBooks company data with Infrascale Cloud Backup, you need to set up and configure a local backup using QuickBooks Desktop built-in features, and then back up the data using OBRM.
Step 1. Set up QuickBooks local backup
For details, see QuickBooks Help.
Open QuickBooks Desktop.
Go to File › Back Up Company › Create Local Backup.
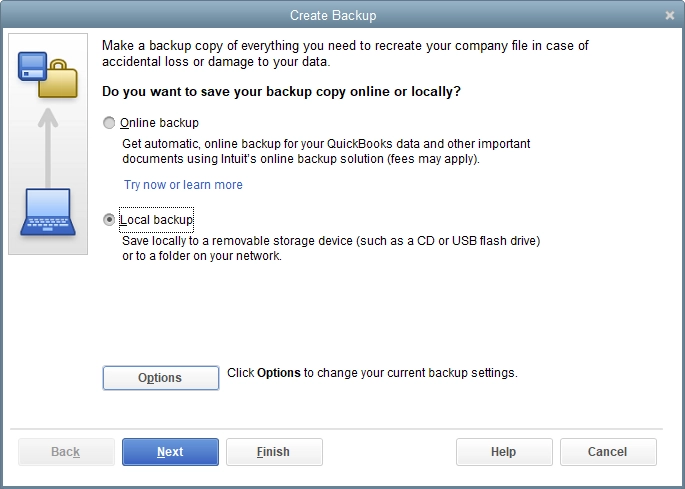
In the Create Backup window, select Local backup, and then click Options.
In the Backup Options window, select where to store backups, and set your backup preferences.
We recommend saving all backup files in a separate folder.

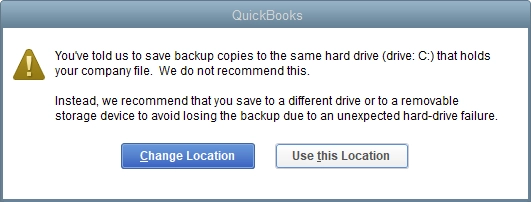
After you click OK, if prompted, you can choose to change backup location, or to use the specified one anyway.
Click Next, and then select one of the available options.
Option Description Notes Save it now Run a one-time backup instantly Save it now and schedule future backups Schedule automatic backups, and then run a one-time backup instantly If you select this option, also select Save backup copy automatically when I close my company file every XtimesOnly schedule future backups Schedule automatic backups If you select this option, also select Save backup copy automatically when I close my company file every XtimesQuickBooks Desktop will create backup files (
.qbb) in the specified location.
Step 2. Set up QuickBooks backup using OBRM
Open OBRM, and then log in with your backup account credentials.
In the main OBRM window, click Configure (
 ) next to File and Folder Backup.
Select Do not scan (select files manually), and then click Next.
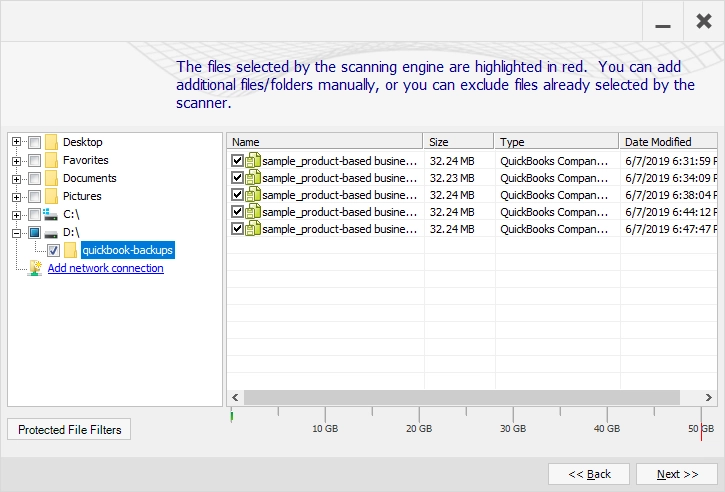
Find and select the folder with QuickBooks backup files, and then click Next.
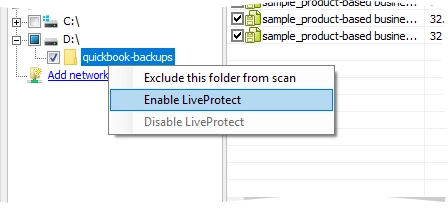
Optionally, you can right-click the selected folder, and click Enable LiveProtect. This will force OBRM to back up the folder both on schedule (if any) and upon any changes to the contents (for example, if a new file appears).
Set your backup preferences, and then click Finish.
OBRM will add the selected folder with QuickBooks backup files to the backup set, and save all to the cloud.
QuickBooks company data recovery
To recover QuickBooks company data with Infrascale Cloud Backup, you need to recover the desired QuickBooks backup file from the cloud, and then restore (import) it using QuickBooks Desktop built-in features.
Step 1. Recover company data from the cloud
Using Online Backup and Recovery Manager
Open OBRM, and then log in with your backup account credentials.
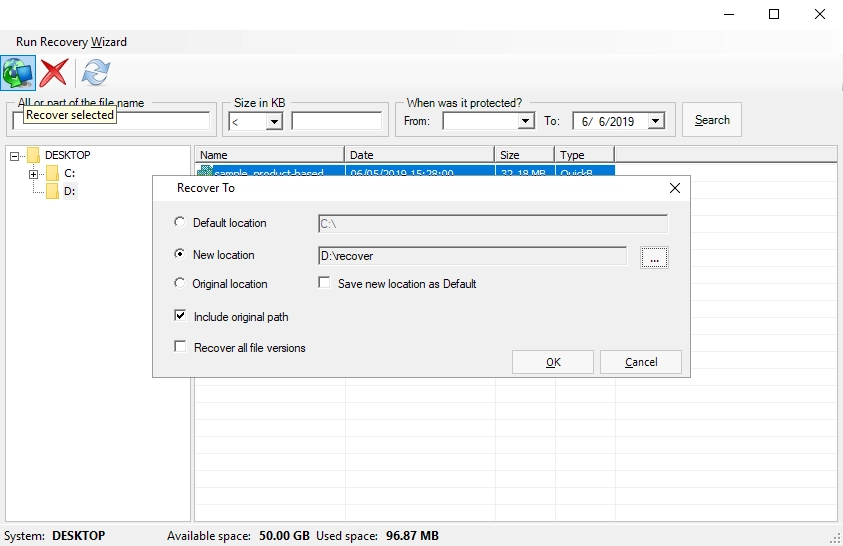
In the main OBRM window, click View/Restore.
Find and select a QuickBooks backup file to recover.
Click Recover selected, or right-click the selected file and click Recover.
Choose where to recover the file, select other options, and then click OK.
Using Dashboard
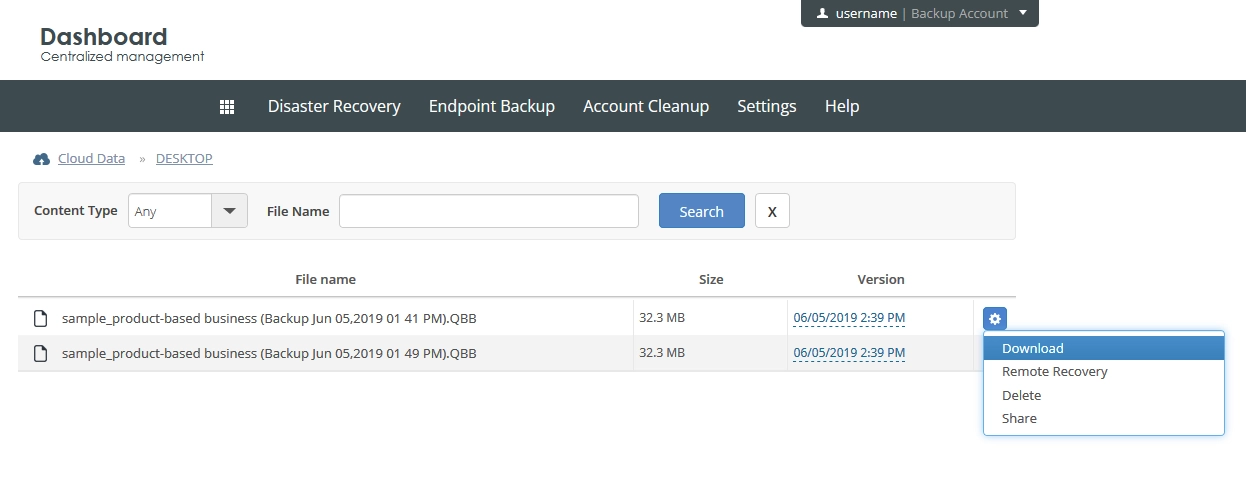
In the Infrascale Dashboard, click Cloud Data.
Find a QuickBooks backup file to recover.
Click Manage (
) › Download next to the file, and then save it to the preferred location.
Step 2. Recover company data in QuickBooks
Open QuickBooks Desktop.
Go to File › Open or Restore Company.
In the Open or Restore Company window:
Select Restore a backup copy, and then click Next.
Select Local backup, and then click Next.
Find and open a QuickBooks backup file recovered previously from the cloud, and then click Next.
Choose where to restore data, and specify the company file name.
QuickBooks Desktop will recover data as a company file (.qbw) to the specified location, and then import it instantly.
