
This article describes how to create restore media and perform a Bare Metal Restore using the Infrascale Backup & Disaster Recovery.
Create restore media
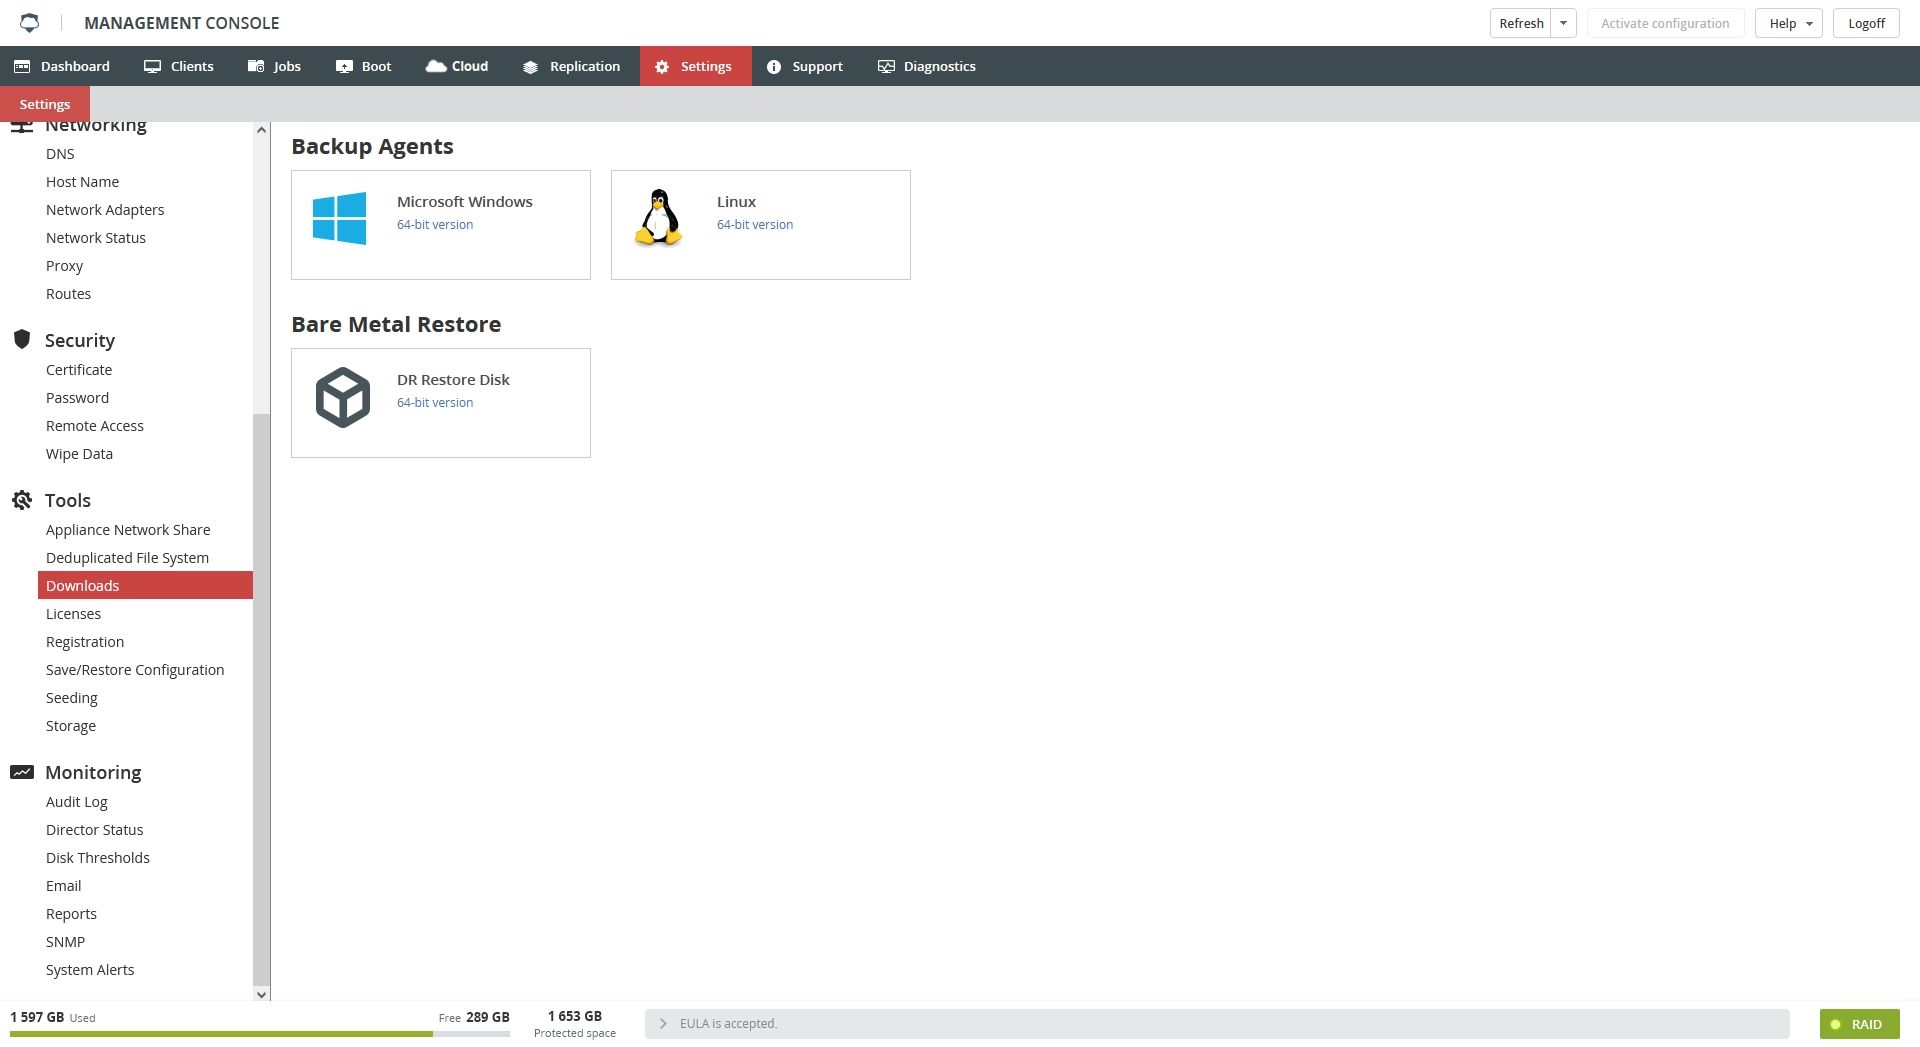
In the Management Console of the Backup & Disaster Recovery appliance, go to the Settings tab.
In the Tools group on the left, click Downloads.
In the Bare Metal Restore group, download the restore disk image (DR Restore Disk).
Create bootable media (for example, a USB flash drive) from the downloaded image.
Restore from the disaster recovery image
Insert the previously created recovery media into the target computer, or mount the Bootable Media ISO on the virtual machine to which you want to restore.
Start the computer and boot from the restore media.
Select Infrascale Baremetal Recovery.
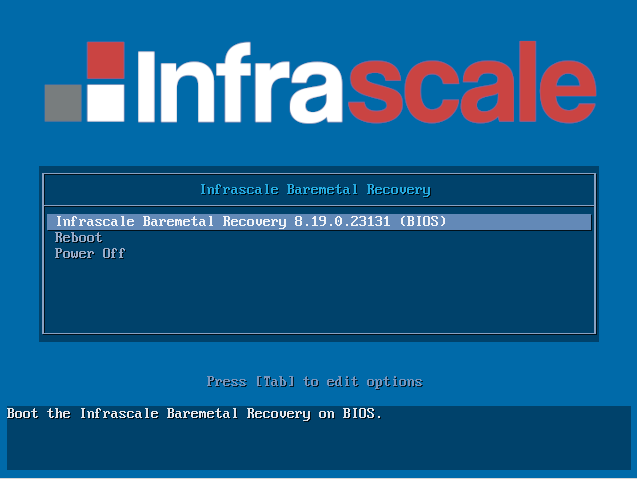
- When the Infrascale logo appears, wait for the boot process to complete
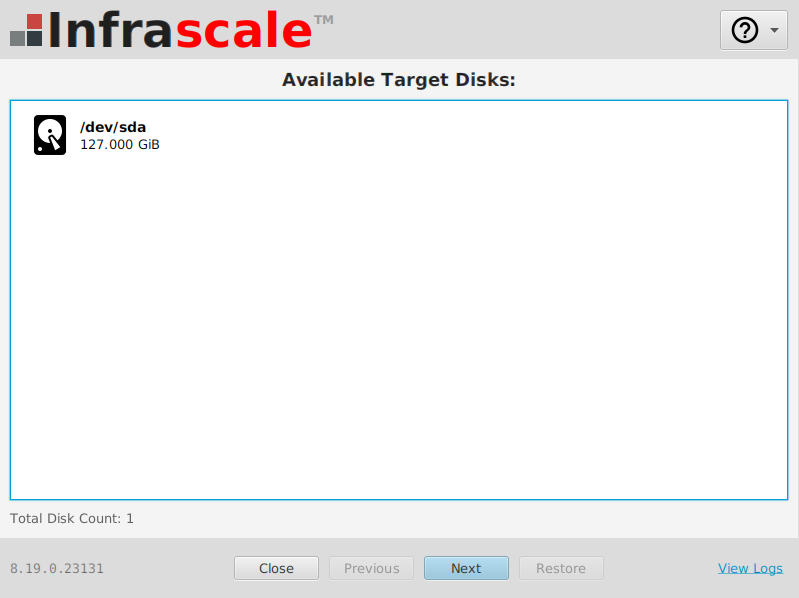
- Once the Bare Metal Restore application starts, select the target disks for the restore and click Next.
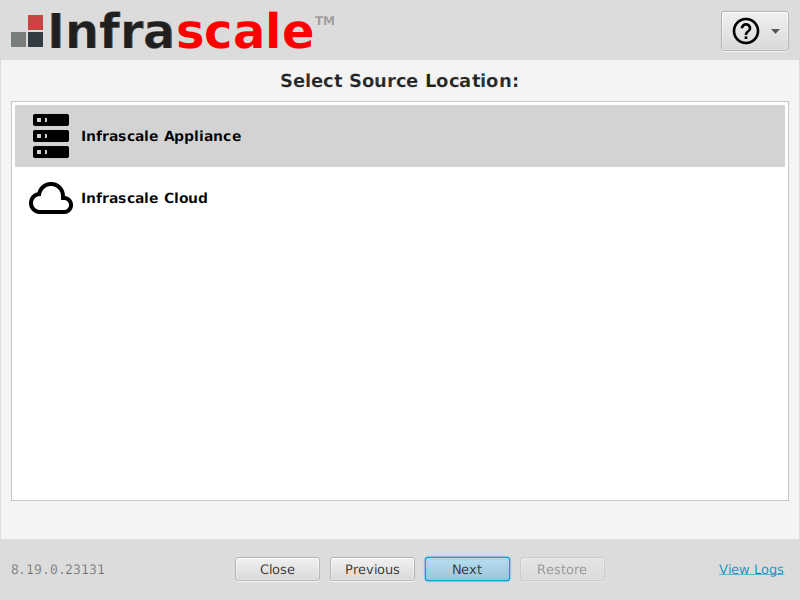
Select one of the following source locations:
Infrascale Appliance – to restore from the local Primary appliance.
Infrascale Cloud – to restore from the cloud.
Click Next.
Restoring from an Infrascale Appliance
If the target computer has a hardware or a hardware-assisted software RAID, before continuing, please check if the DR restore disk supports the RAID controller, and thus can perform restore as per the RAID configuration.In the list of available appliances, select the appliance you want to restore from and click Next
- If Infrascale Appliance is selected, a list of available appliances is displayed. Select the appliance you want to restore from and click Next.
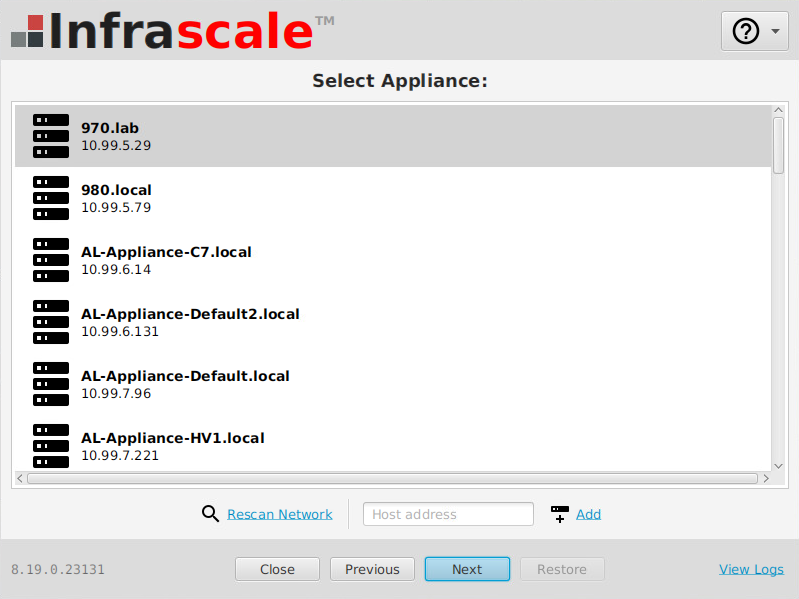
If the system does not show any appliances on the list, click Rescan Network to automatically detect appliances available on the network.
If the system is still unable to detect any appliances automatically, enter the Host address of the appliance and click Add.
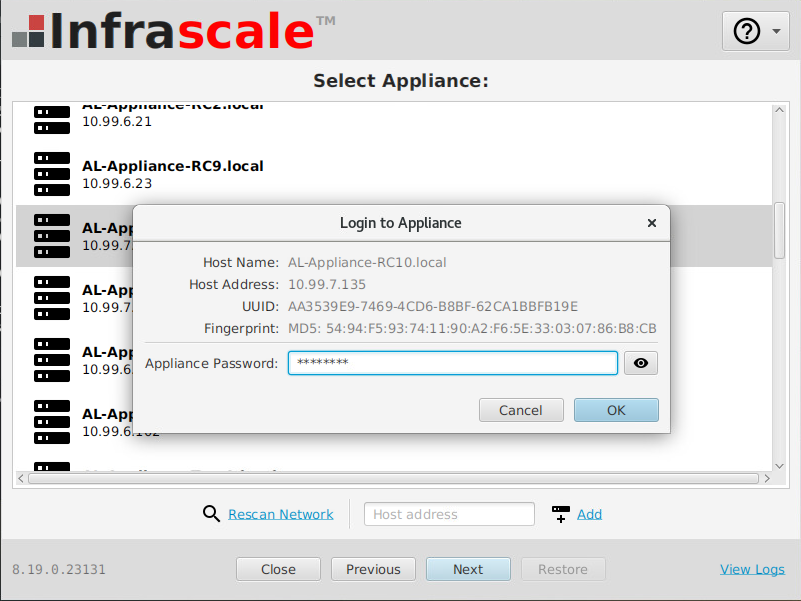
- When prompted, enter the Management Console password and click OK.
- Continue restoring.
Restoring from an Infrascale Cloud
- If Infrascale Cloud was selected as the source location, step-by-step instructions for connection configuration are displayed:

Follow the instructions as shown below and click Next
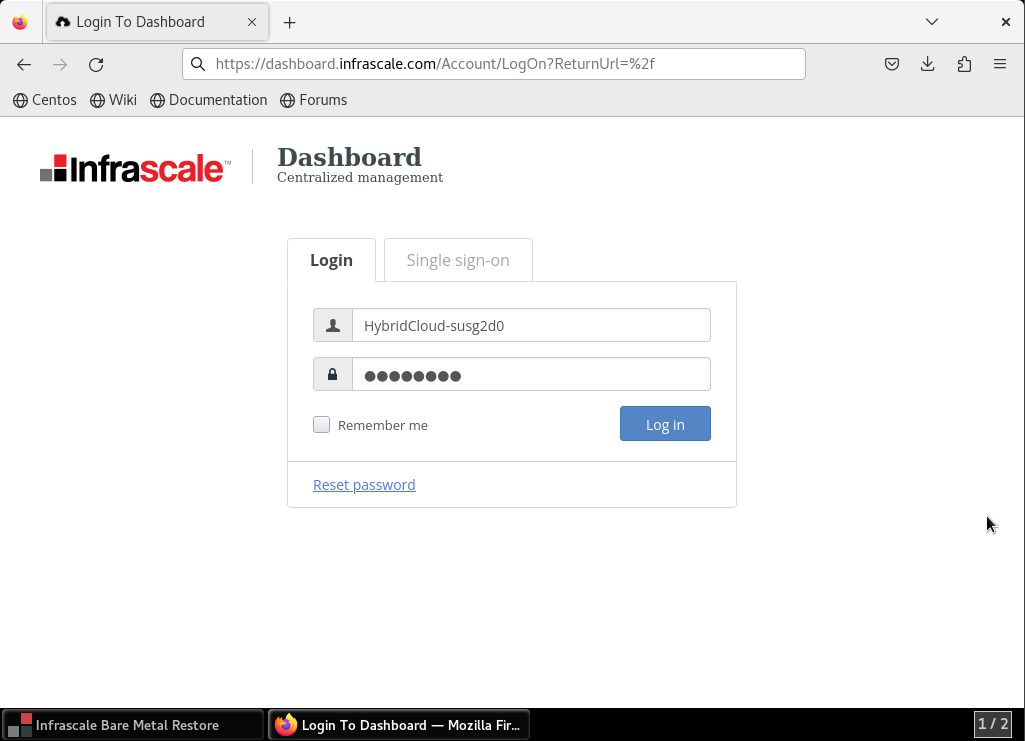
- Click the provided link to log in to the Infrascale Dashboard and enter your credentials.
- Navigate to the Disaster Recovery > Hybrid Cloud Status
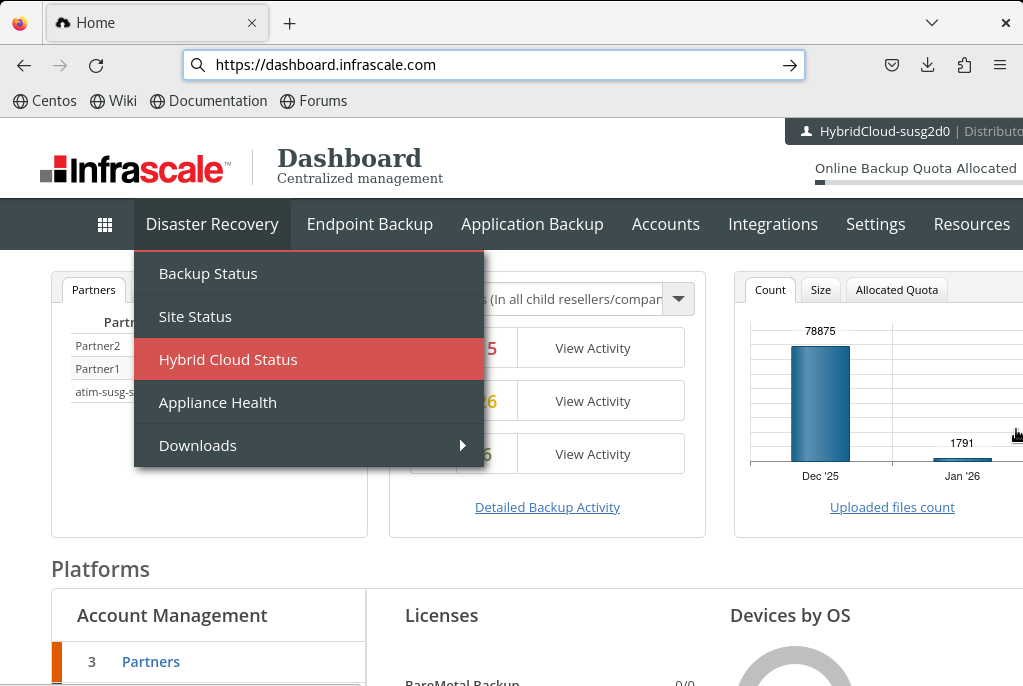
- in the Primaries section:
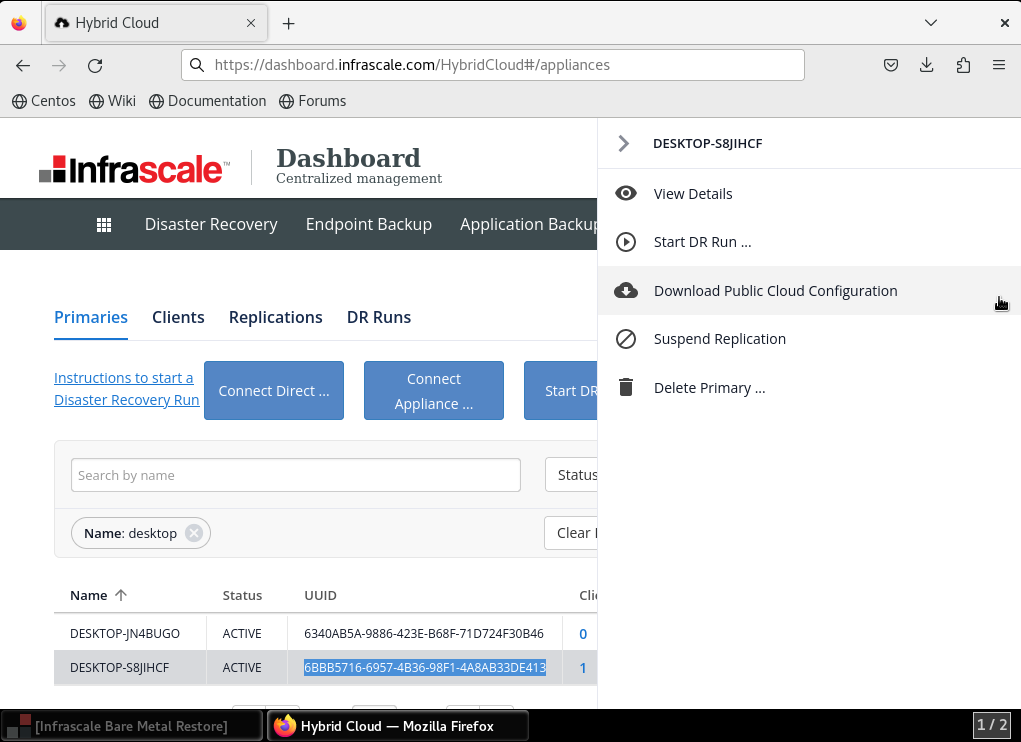
- Select the client machine you wish to restore
- Download the Cloud Configuration file
- Select and copy the UUID
- Select the client machine you wish to restore
- Return to the Bare Metal restore tool:
- Select the Cloud Configuration file downloaded on the previous step
- Paste the UUID
- Click Next

- Select the Cloud Configuration file downloaded on the previous step
Continue restoring
- Select the required machine, then choose a snapshot based on the desired restore point, and click Next

- Configure the Disk Mapping as required and click Next
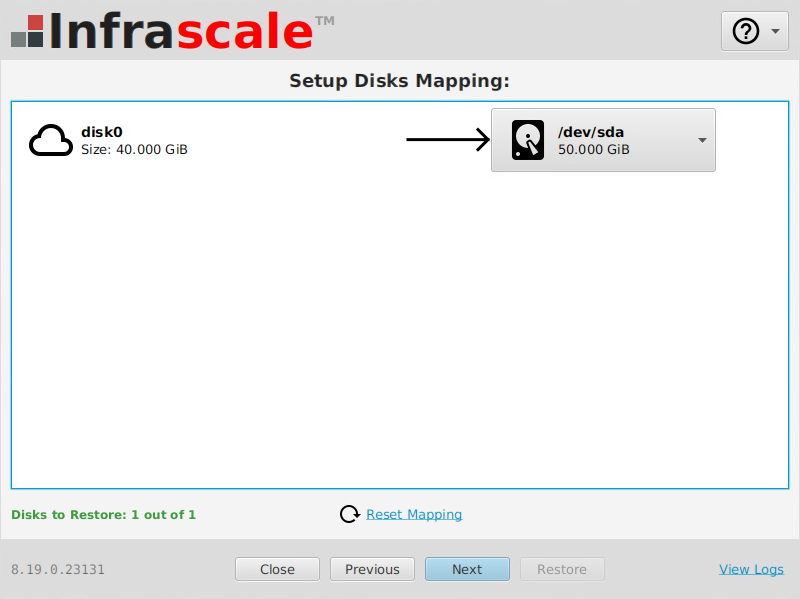
The target virtual machine or physical server must have disk capacity equal to or greater than the original source system
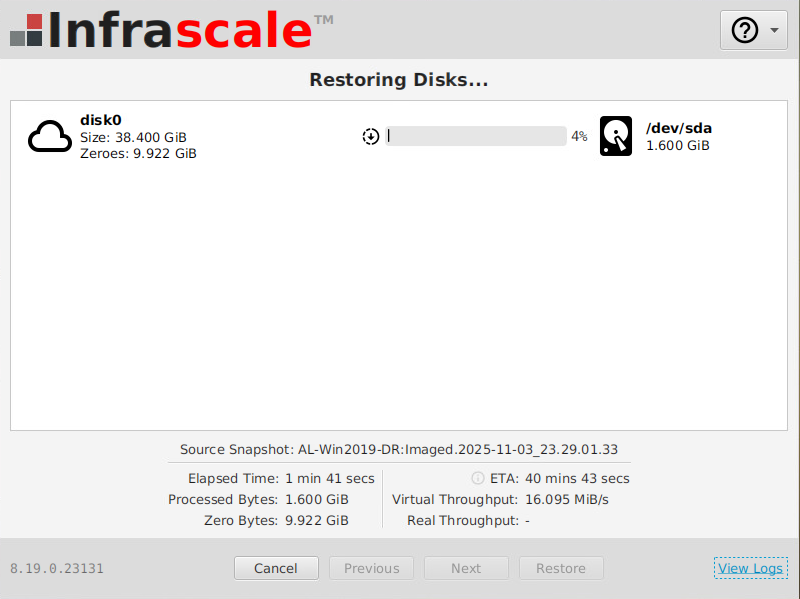
- Review the disk mapping and click Restore to start the restoration process.
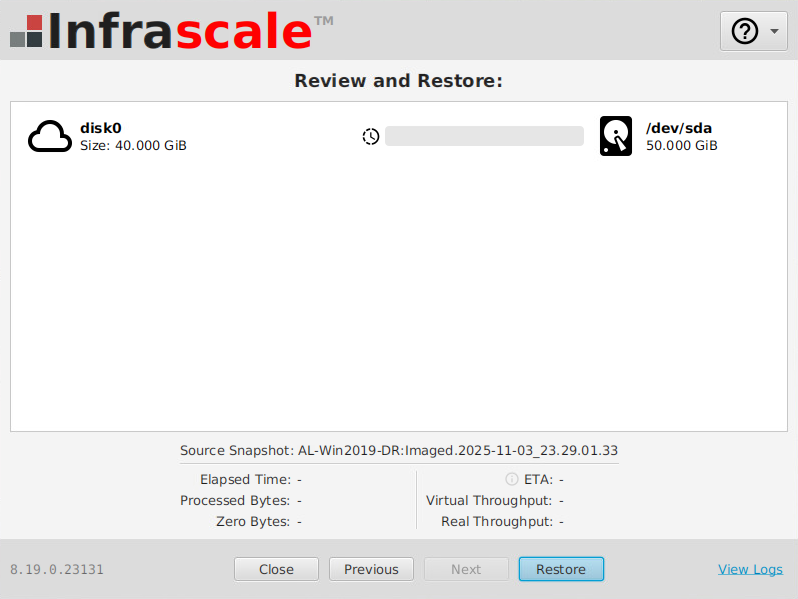
- Monitor the restore progress in the disk status screen.
- Once the restore is complete, click Reboot and confirm by selecting Yes.
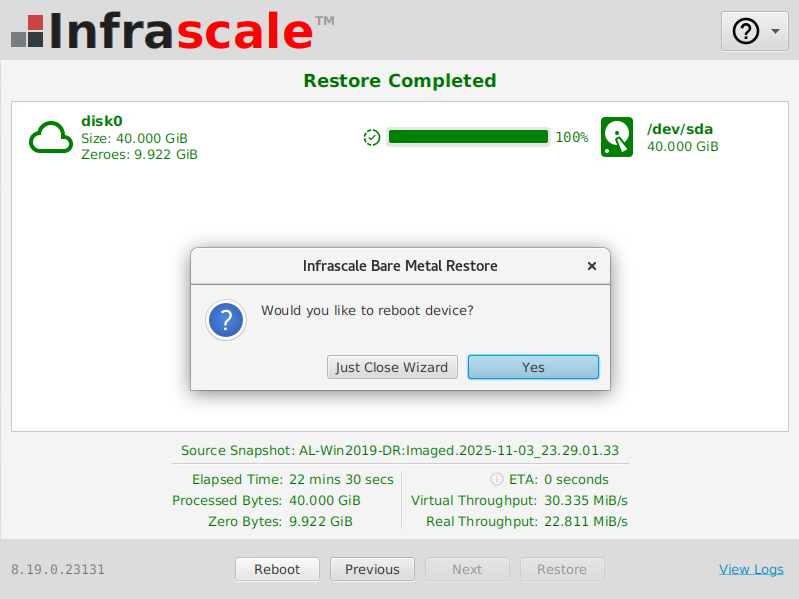
Remove the restore media when restarting the computer. After reboot, the system should start successfully in the restored state.
Check RAID controller support
If the computer you plan to restore to has a hardware or a hardware-assisted software RAID, you may check if the DR restore disk supports the RAID controller and thus can perform a restore as per the RAID configuration.
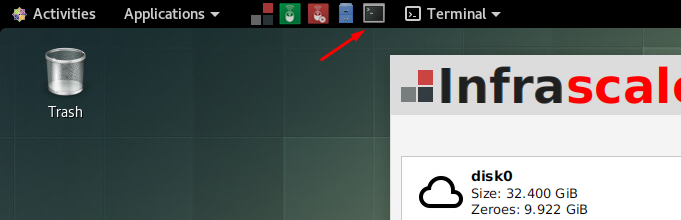
For this, after booting the target computer from the restore media:
Click Terminal in the top menu to open shell.
View information about the SCSI devices attached to the system.
For this, run the
lsblkcommand followed by the-Sooptions and the+SIZEparameter.lsblk -So +SIZEThe system lists all SCSI devices currently attached.

Check if the system detected the RAID controller.
If the RAID controller is on the list, this means the DR restore disk supports it.
If the RAID controller is not on the list, this means the DR restore disk does not support it by default.
You have to find and install drivers for the RAID controller manually before proceeding with the restore. If necessary, contact Infrascale Support for assistance.
Close the Shell and continue restoring.
Example check:
Suppose we have a computer with LSI MegaRAID SAS 9266-4i controller.
We list all SCSI devices attached to the system.
lsblk -So +SIZE In the output, we see that the system detected a block device named sda with the size of 36.4 TB and managed by our RAID controller LSI MR9266-4i.
NAME HCTL TYPE VENDOR MODEL REV TRAN SIZE sda 0:2:0:0 disk LSI MR9266-4i 3.44 36.4T sdb 2:0:0:0 disk ATA INTEL SSDSC2BB24 0130 sata 223.6G sdc 7:0:0:0 disk ATA SATA SSD 02.1 sata 14.9G sdd 1:0:0:0 disk SanDisk Ultra 1.00 usb 57.3G Now, we can continue restoring.