Step 1. Log in to the Management Console
After checking and configuring the network settings, log in to the Management Console of the Backup & Disaster Recovery appliance with the default credentials:
In the Username box, enter
admin.In the Password box, enter
rvxd2d2d, and then click Login.

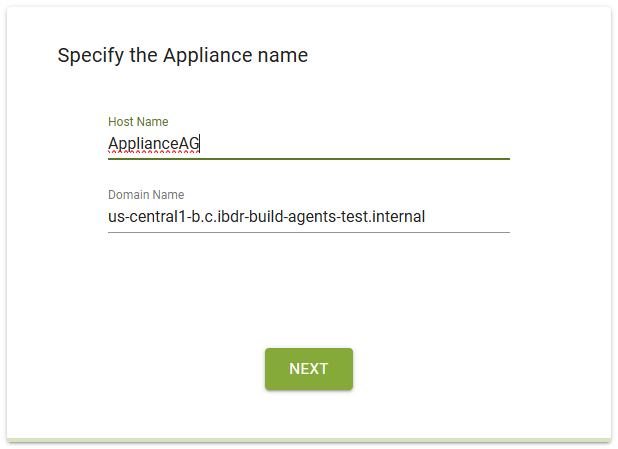
Step 2. Specify the appliance name
After logging in to Management Console of the Backup & Disaster Recovery appliance, specify an identifiable name for the appliance consisting of the following two parts:
- Host Name
- Name by which the rest of the network devices will refer to the appliance. It can contain only alphanumeric characters and hyphens (for example,
backup-1). Hyphen cannot be the first or the last character in the name. Maximum length is 63 characters. - Domain Name
- Name of your network domain. It can contain only alphanumeric characters, periods, and hyphens (for example,
backup.your-domain.com). Hyphen cannot be the first or the last character in the name. Cannot contain two or more periods in a row.
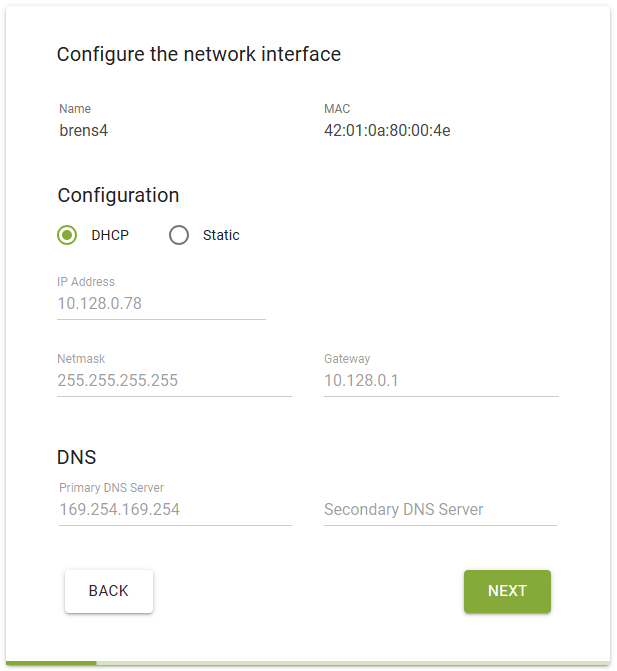
Step 3. Configure the network interface
After specifying the appliance name, configure its network interface.
You can either allow the appliance to automatically receive network settings from the DHCP server, or to configure them manually.
For proper operation, the appliance requires a permanent network address. Therefore, we highly recommend assigning a static IP address.
Also, we recommend adding an external DNS server, for example Google Public DNS (8.8.8.8), so the appliance has proper Internet access.
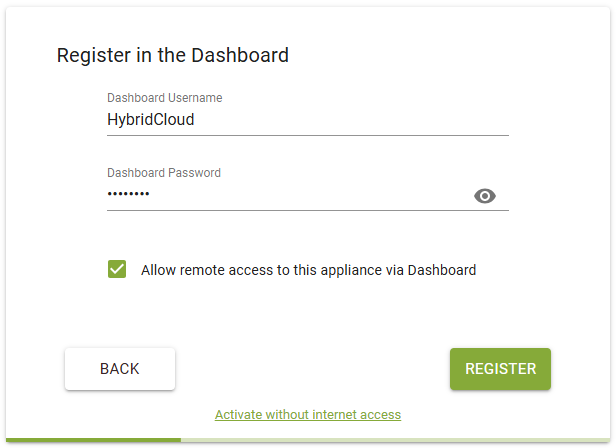
Step 4. Register in the Dashboard
After configuring appliance network interface, register the appliance in the Dashboard:
Enter your Dashboard account name and password.
You can find your Dashboard account credentials in the email sent to you automatically by our systems. Otherwise, contact your Infrascale implementation specialist.
Select Allow remote access to this appliance via Dashboard if needed, and then click Register.
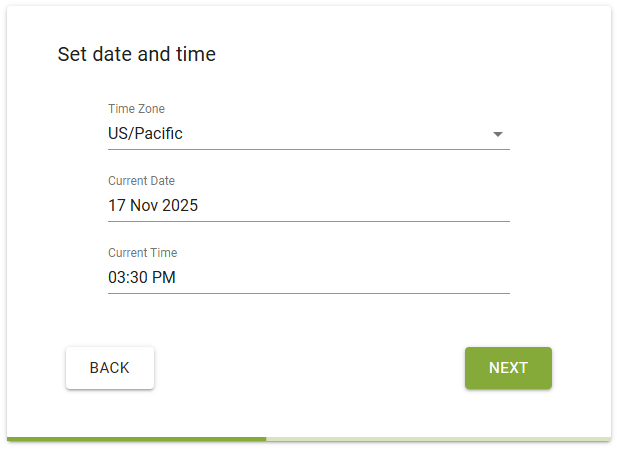
Step 5. Set date and time
After registering the appliance in the Dashboard, set the local geographic time zone, date, and time.
The appliance uses these settings globally within all data backup schedules. Make sure to set them properly.
Step 6. Change the default password
After setting the appliance date and time, change the default local administrator password for security purposes.

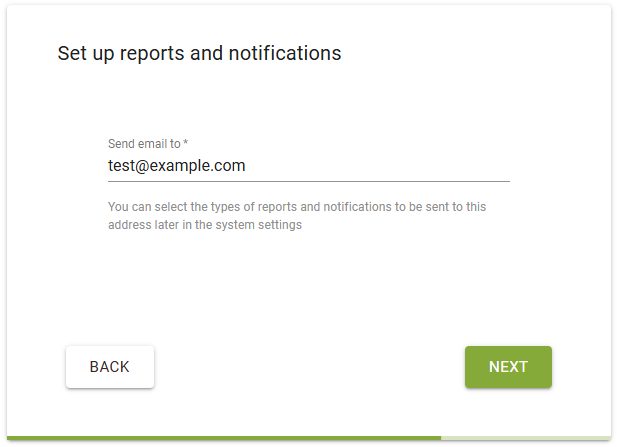
Step 7. Set up reports and notifications
After enabling cloud replication, enter an email address to send all appliance reports and notifications to.
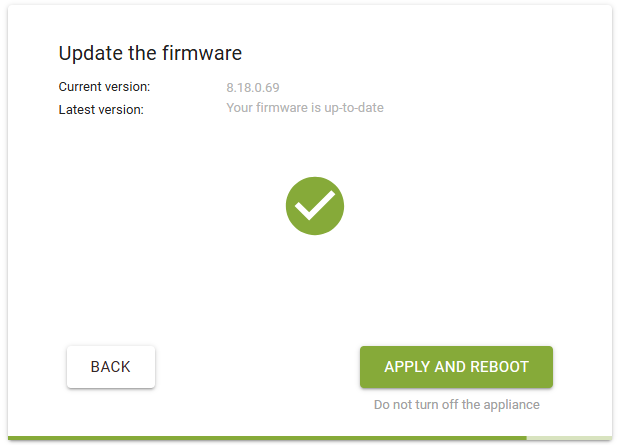
Step 8. Update the firmware
At the last stage, the appliance checks for firmware updates.
Click Apply and Reboot to update the firmware, if available, and to save changes.