Setup flow
| # | Step | Description |
|---|---|---|
| 1 | Set up SCIM in the Dashboard | Turn on and configure SCIM in the Infrascale Dashboard |
| 2 | Set up SCIM in Okta | Turn on and configure SCIM in Okta |
To set up and configure SCIM, your Infrascale Dashboard account must have the administrator role.
Set up SCIM in the Dashboard
To set up SCIM, you need to turn it on first in the Infrascale Dashboard. For this:
Sign in to your account in the Infrascale Dashboard.
Go to Settings › SCIM User Management.
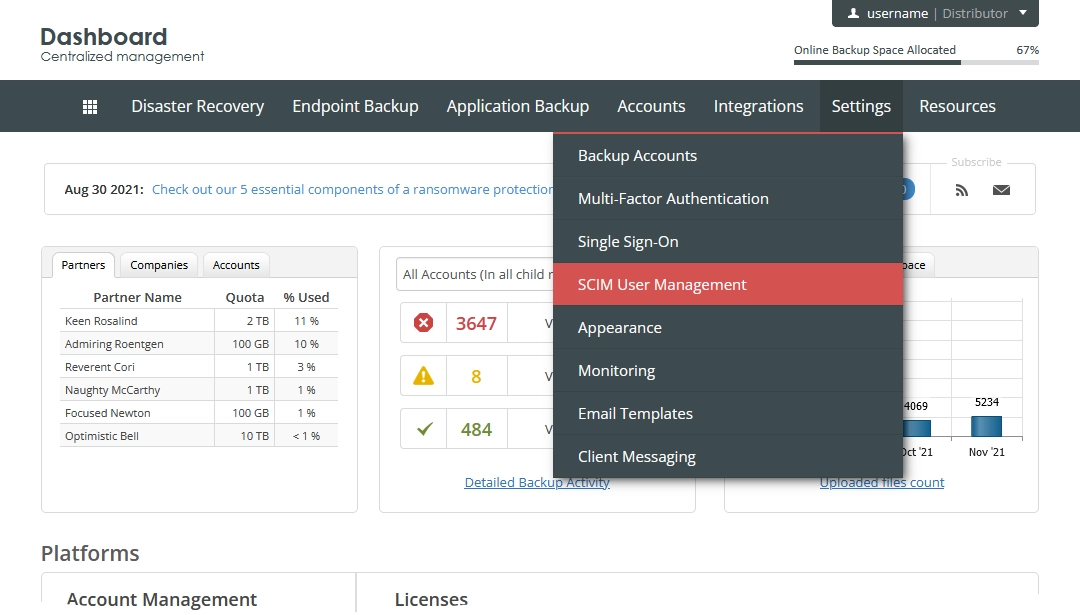
The SCIM setup page opens.
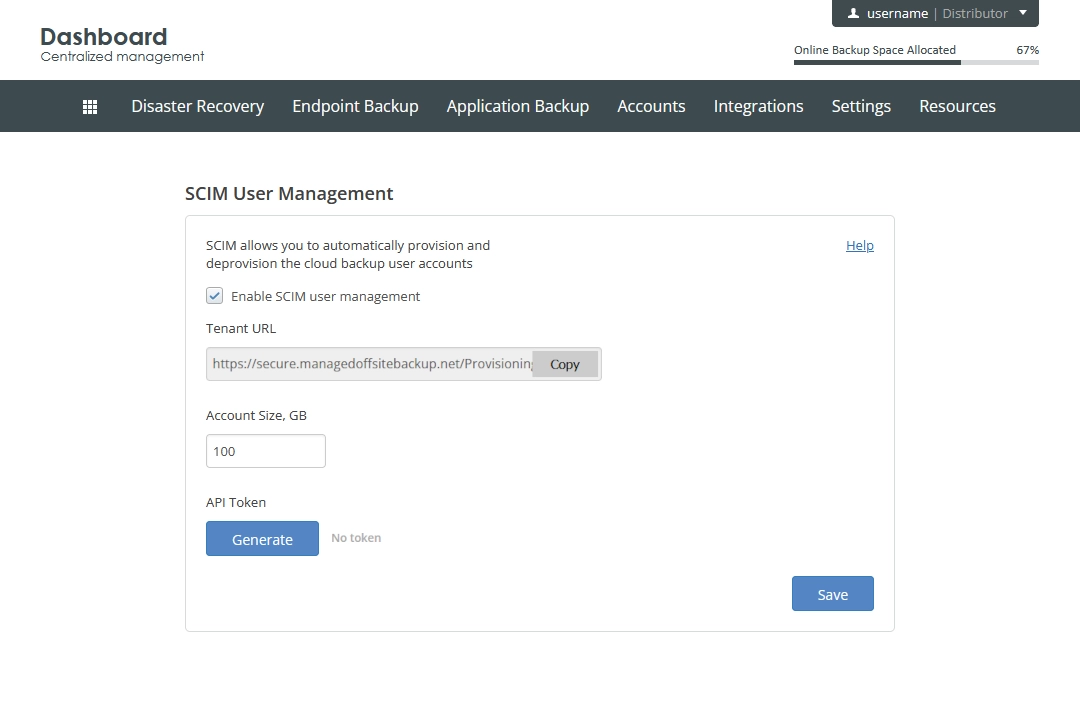
Select Enable SCIM user management to turn the SCIM integration on.
In the Tenant URL box, note the automatically provided URL address.
This address is used when setting up SCIM in Okta.
In the Account Size box, enter the amount of space in the cloud (in GB) to allocate to each backup account during provisioning.
In the API Token group, click Generate to get an API token.
API token is used to connect the Okta app for SCIM with the Infrascale services.
Since the system shows the token only once, and you have to use it when setting up SCIM in Okta, make sure to copy and save it somewhere safe.
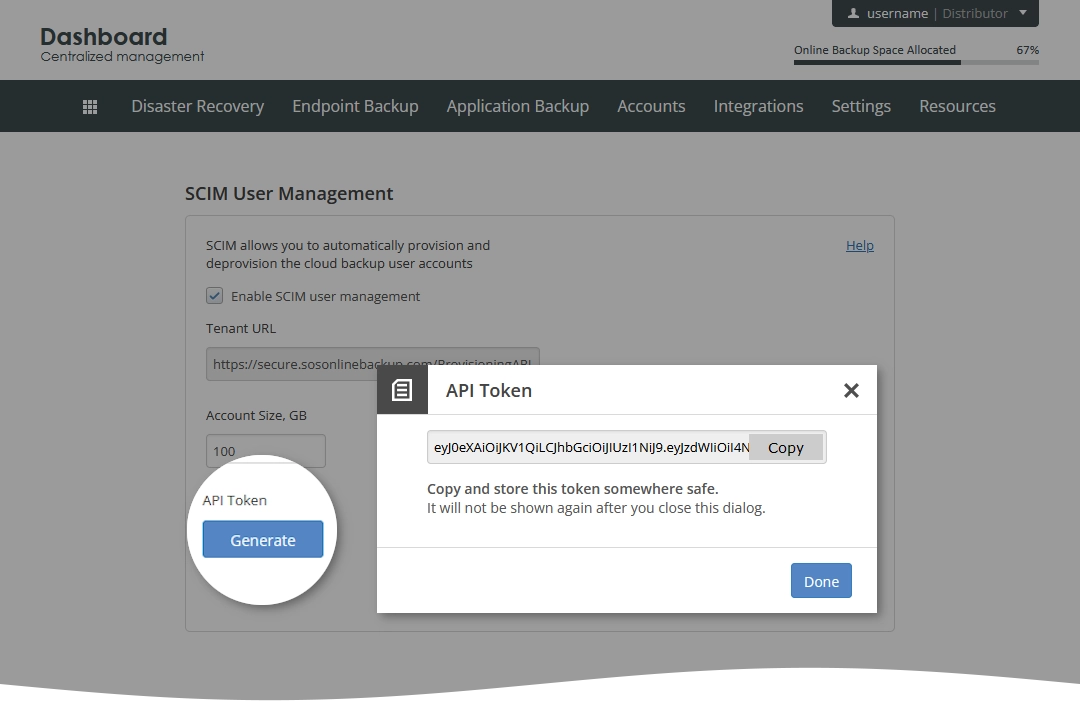
Click Save to apply changes.
Set up SCIM in Okta
To set up and configure SCIM in Okta, you can create a new or use an existing Okta app (for example, the one you created when setting up SSO).
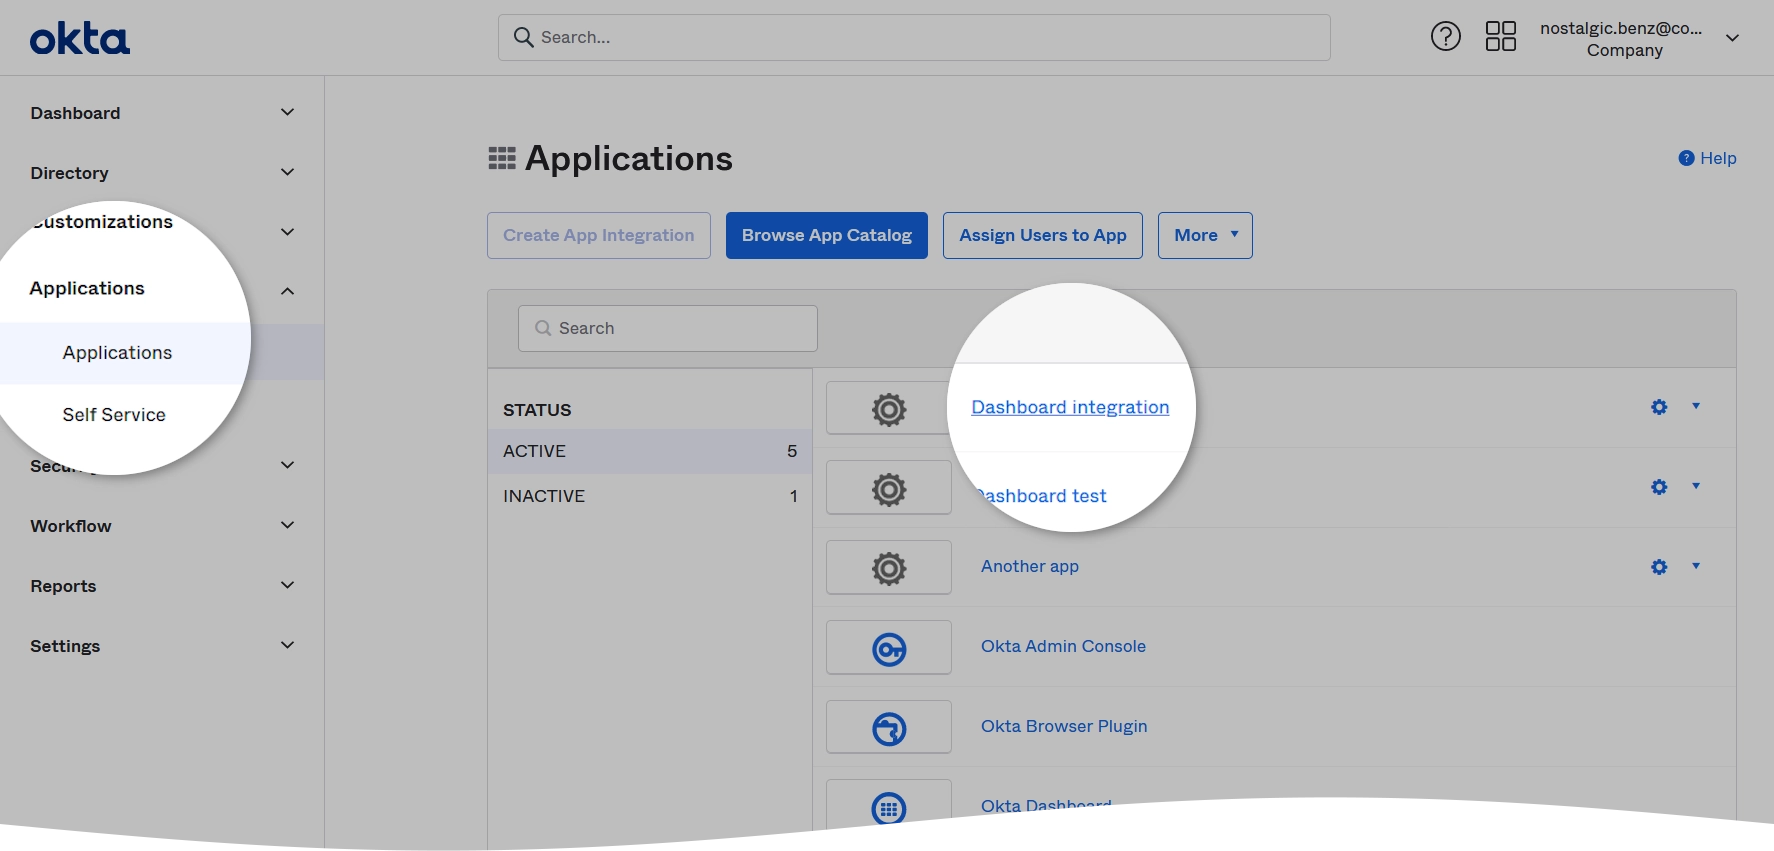
In the Okta Admin Console, go to Applications › Applications.
Find and open the app you intend to use for the SCIM user management.
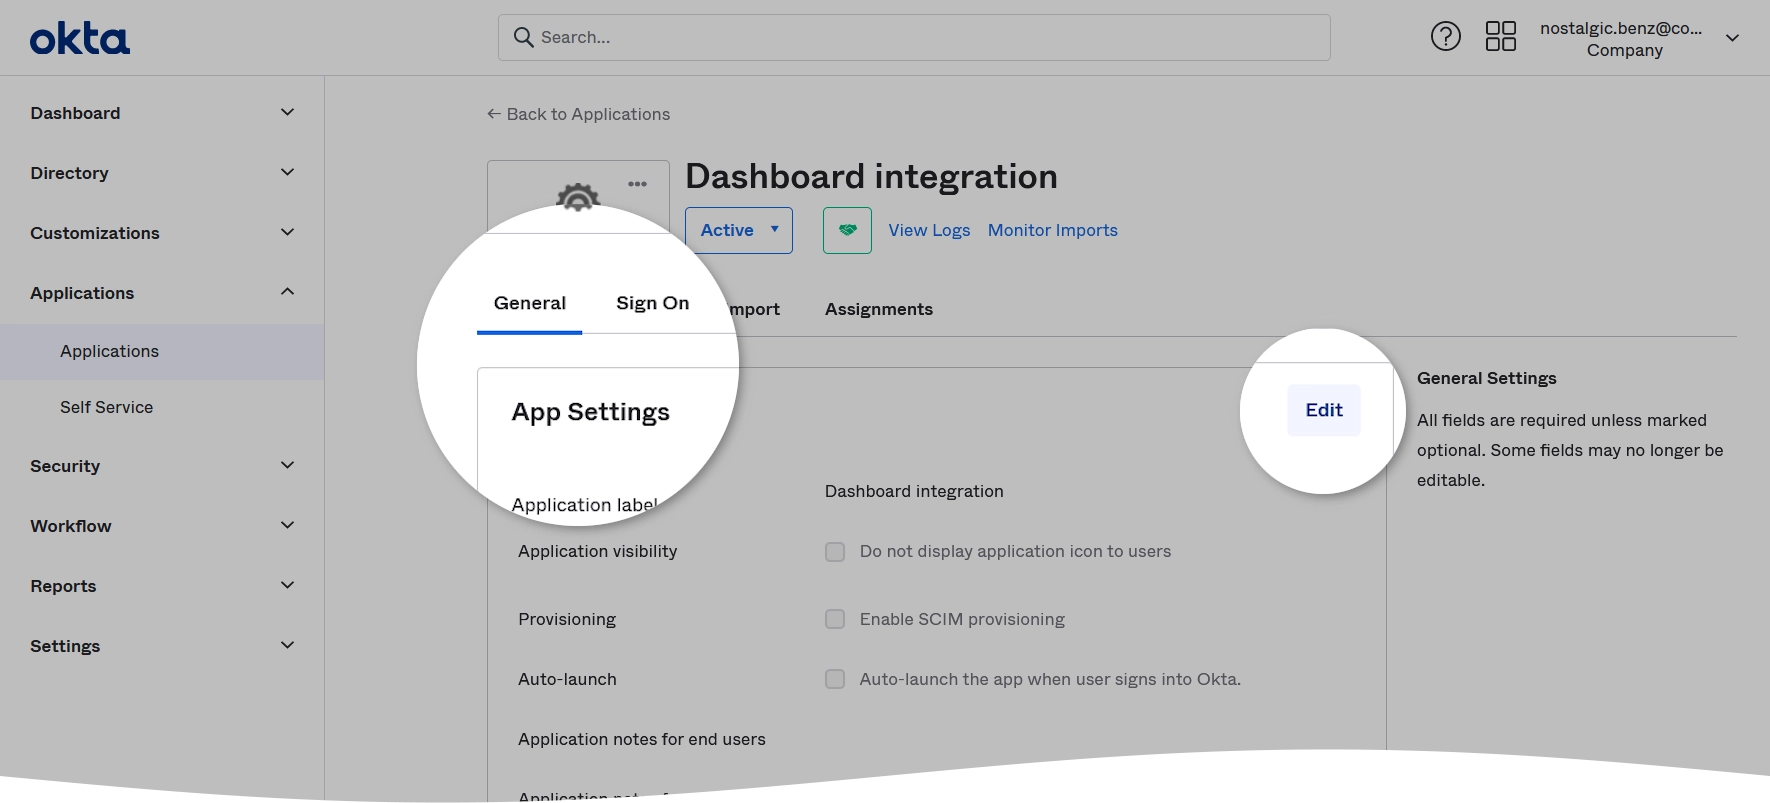
On the General tab, in the App Settings group, click Edit.
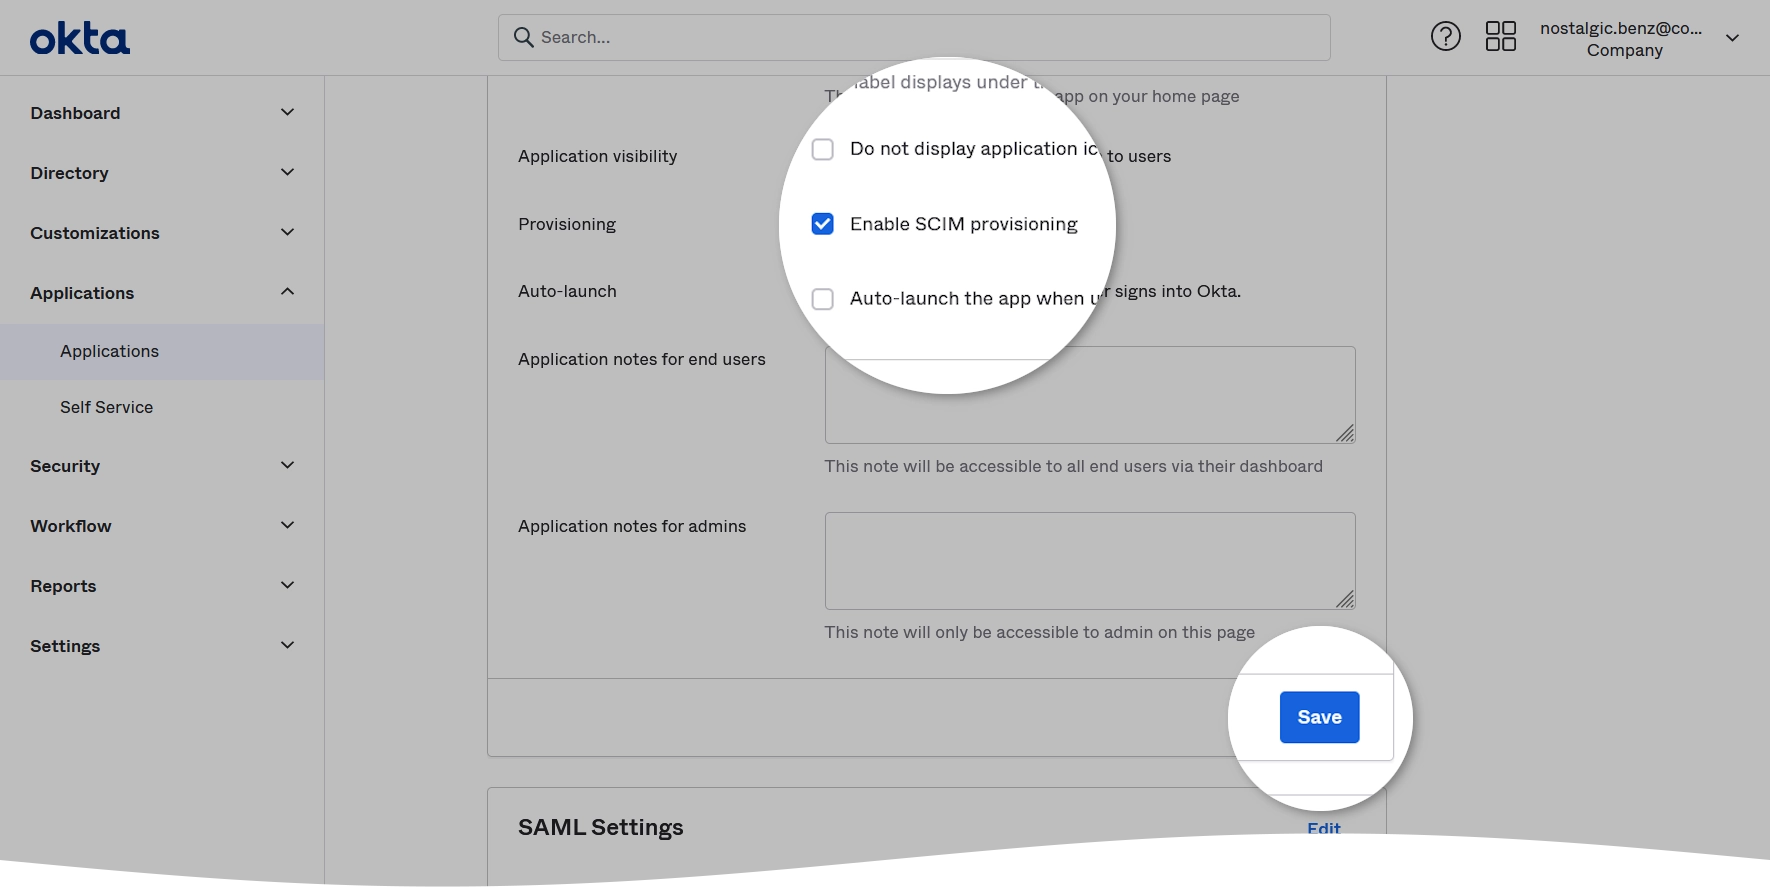
Select Enable SCIM provisioning, and then click Save to apply changes.
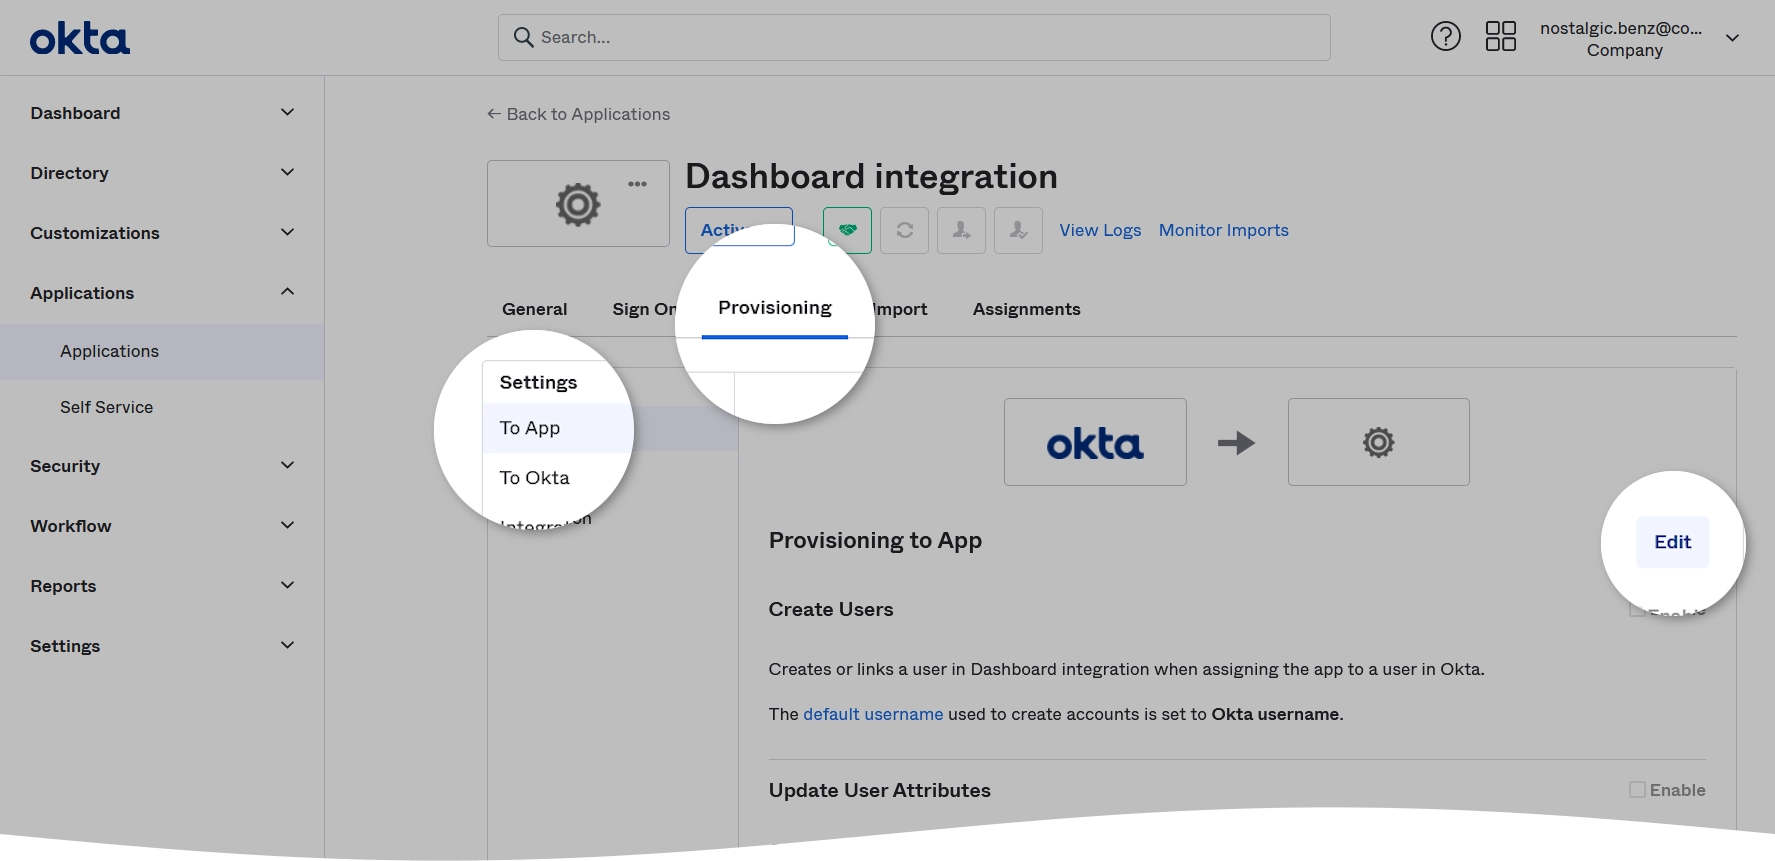
Go to the Provisioning tab, and, in the Integration section, click Edit.
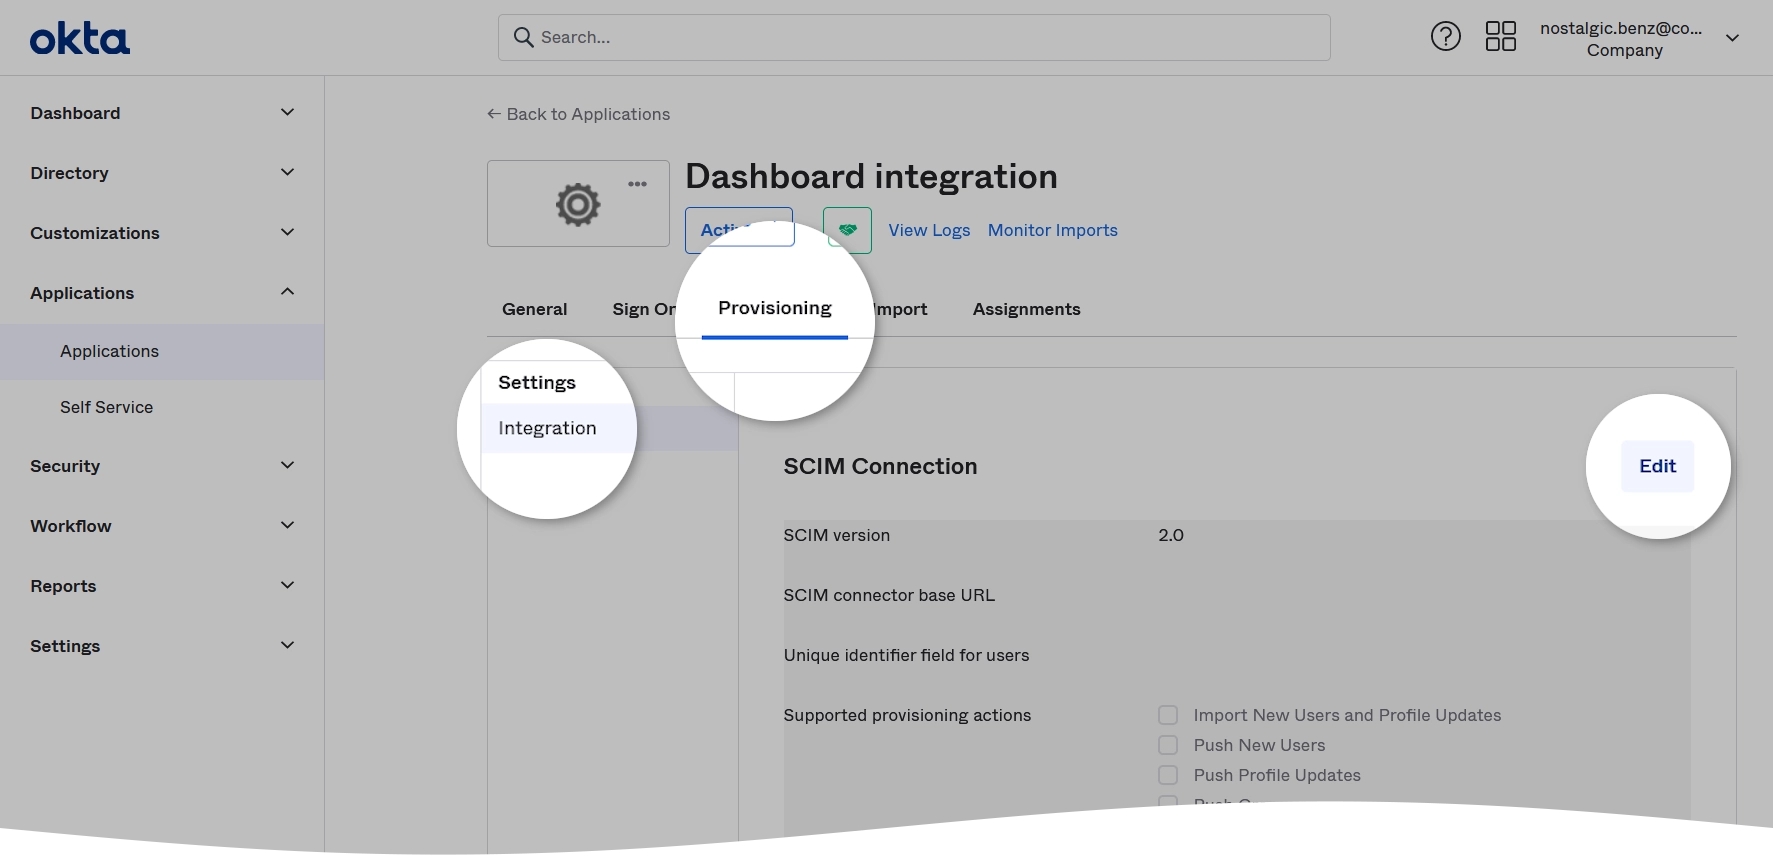
Configure the following SCIM settings:
In the SCIM connector base URL box, enter the tenant URL address provided automatically in the Infrascale Dashboard.
In the Unique identifier field for users, enter
userName.In the Supported provisioning actions group, select Push New Users and Push Profile Updates.
In the Authentication Mode drop-down list, select HTTP Header.
In the Authorization box, enter the API token you generated when setting up SCIM in the Infrascale Dashboard.
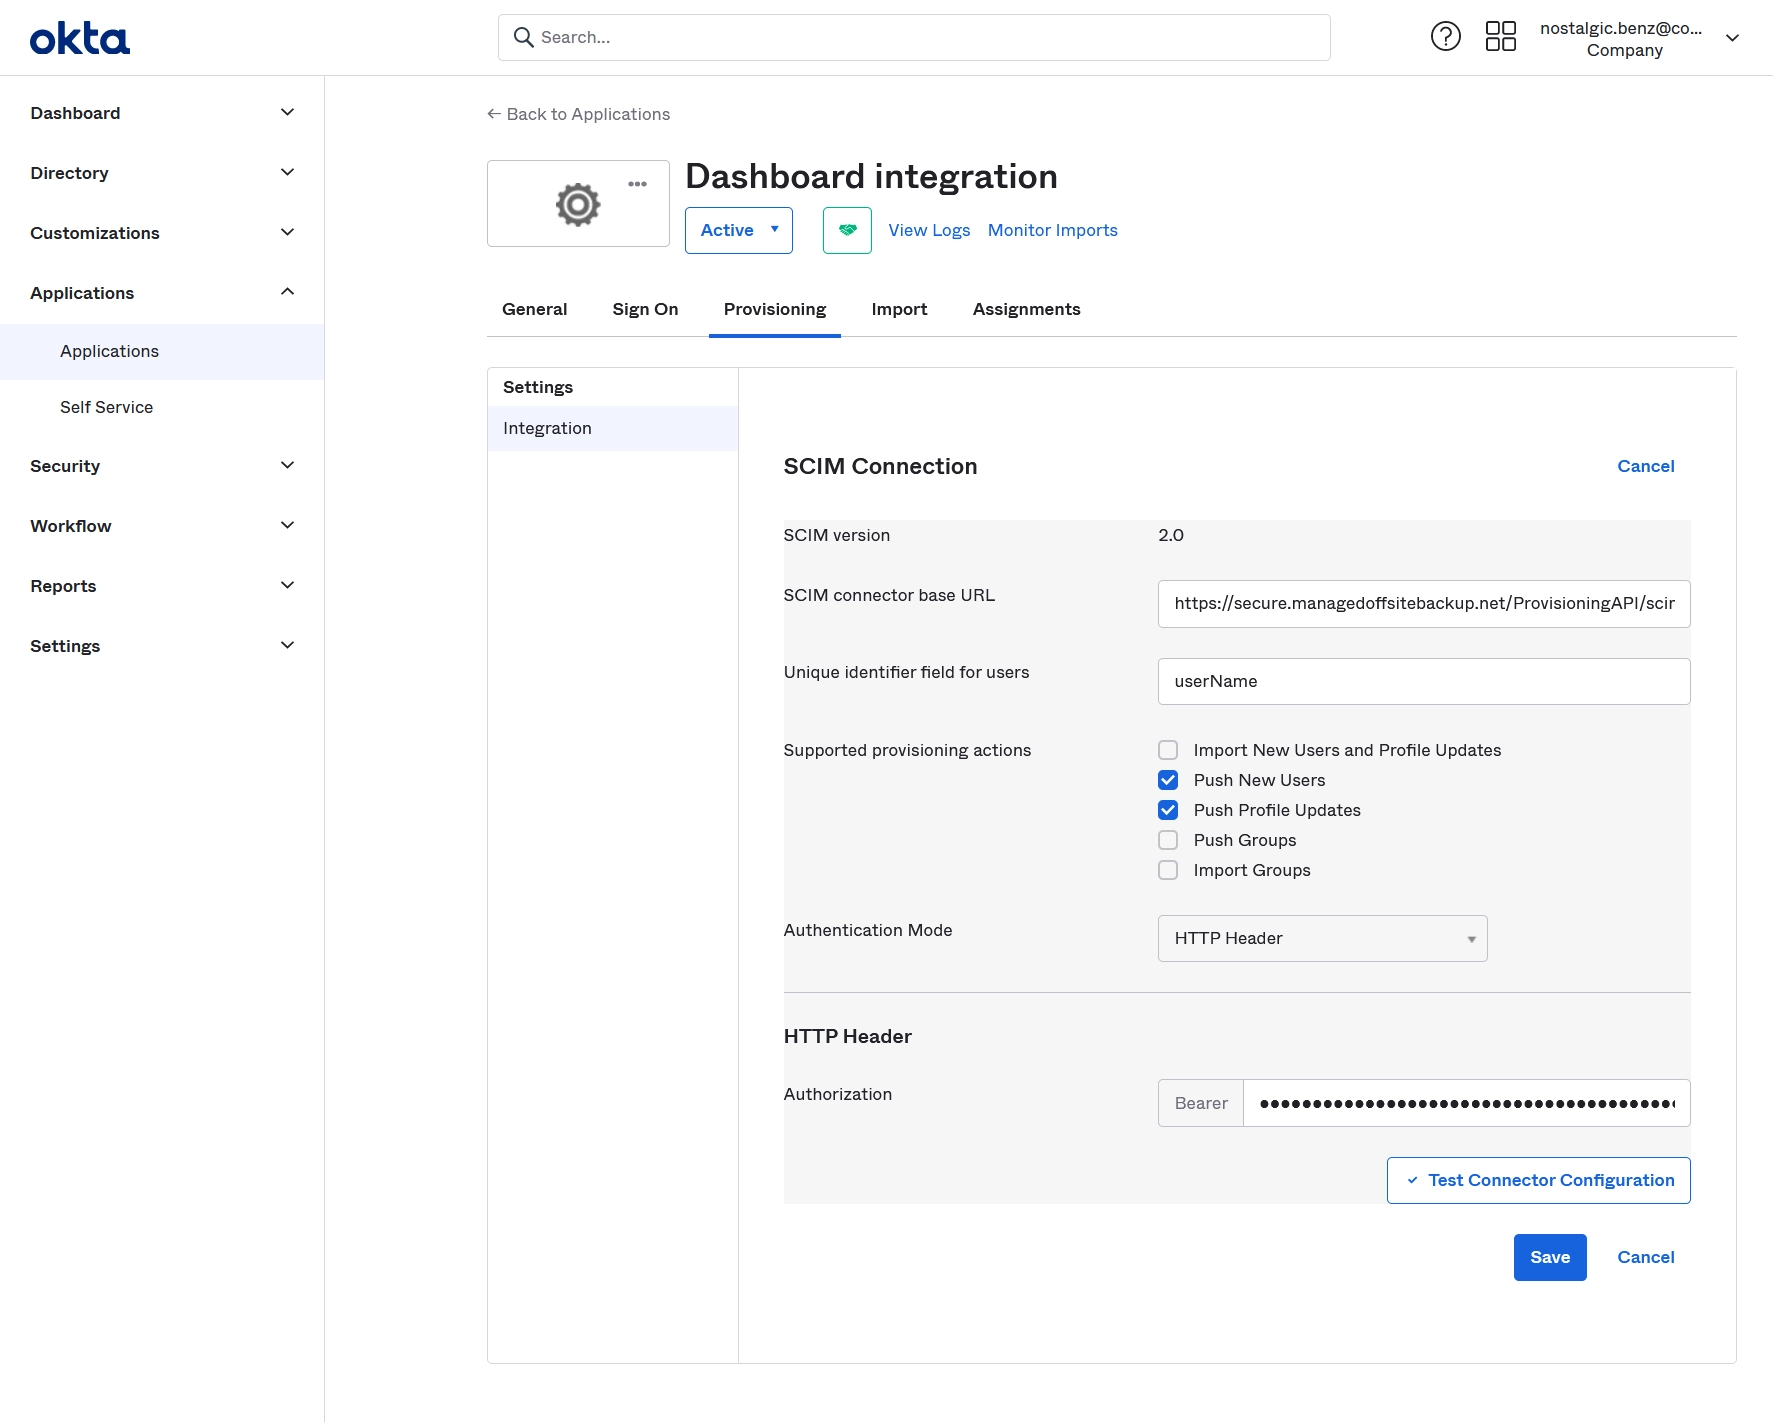
Click Test Connector Configuration to check the connection between Okta and the Infrascale services, and then click Save to apply changes.
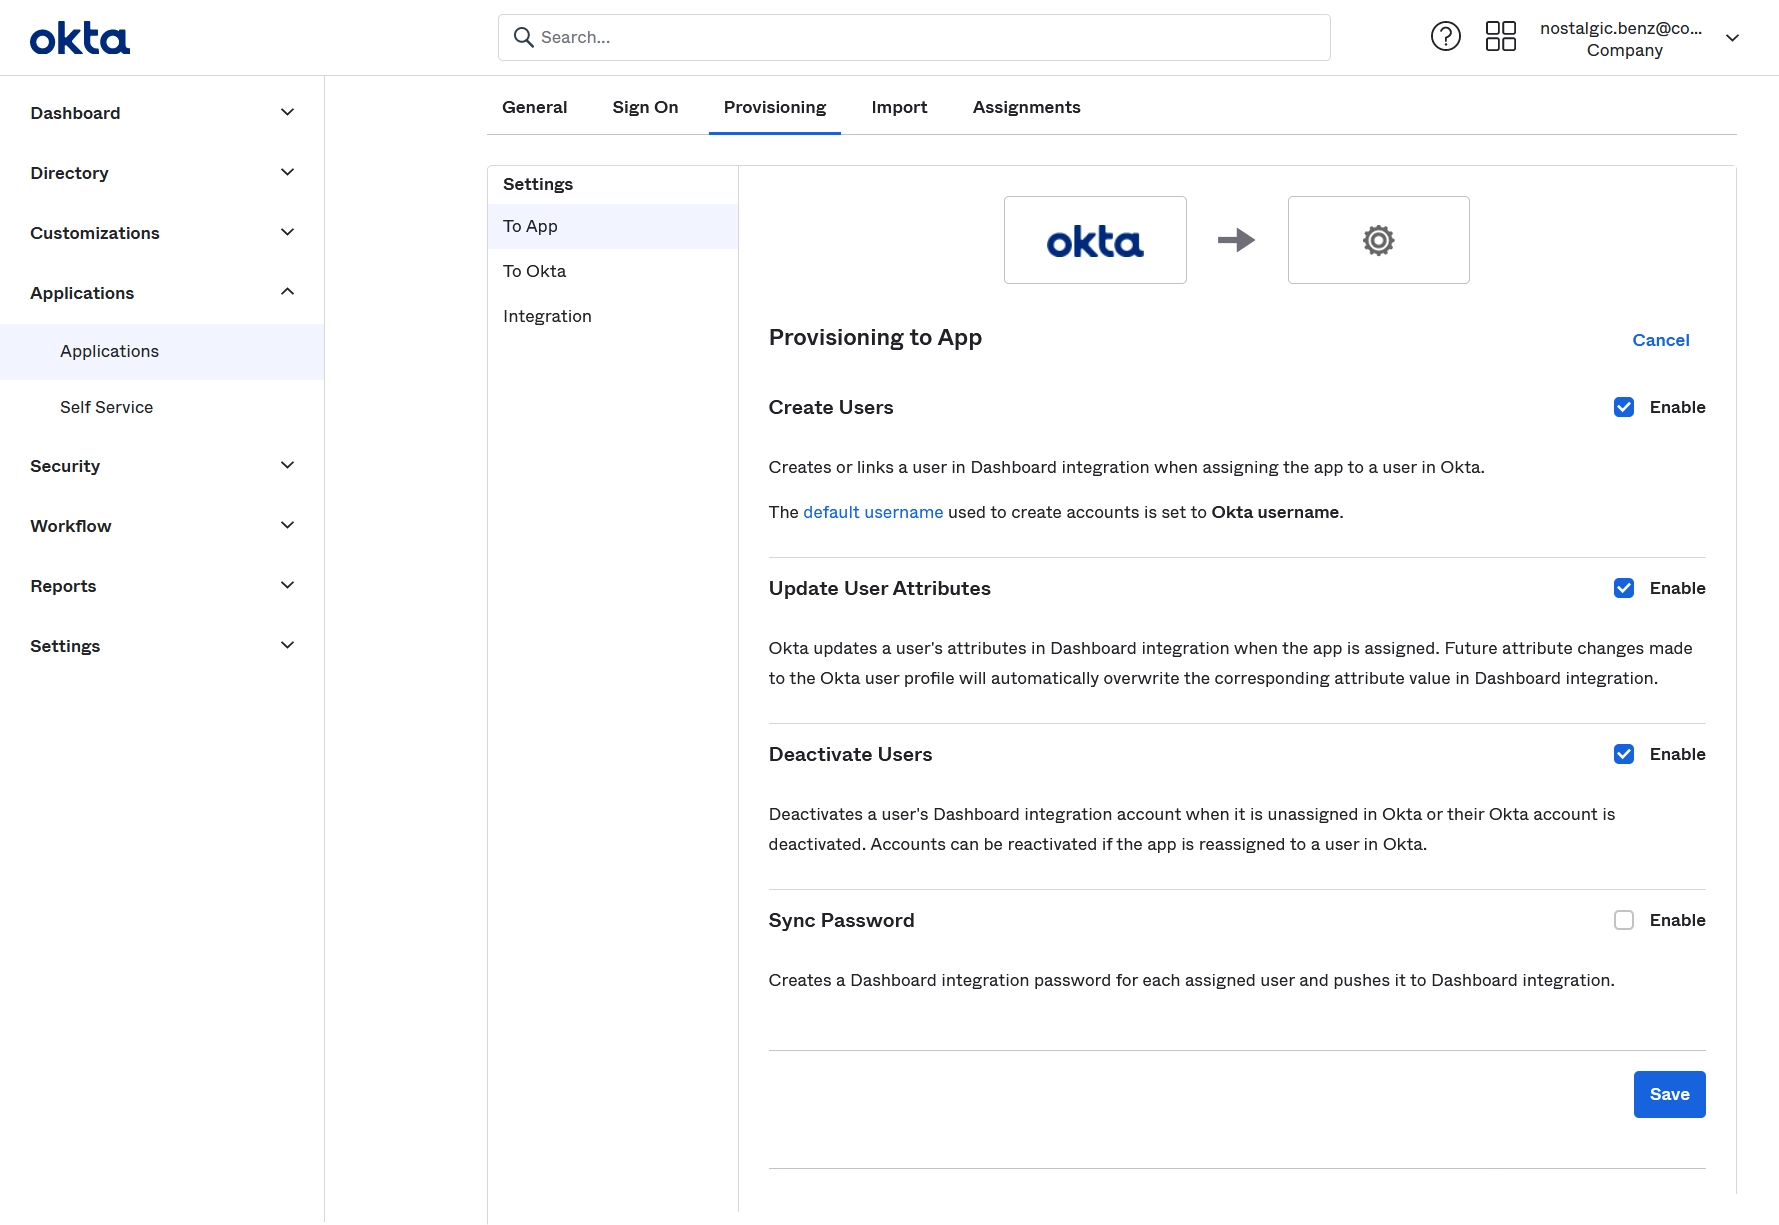
Go to the Provisioning tab, and, in the To App section, click Edit.
In the Provisioning to App group, select Create Users, Update User Attributes, and Deactivate Users, and then click Save to apply changes.
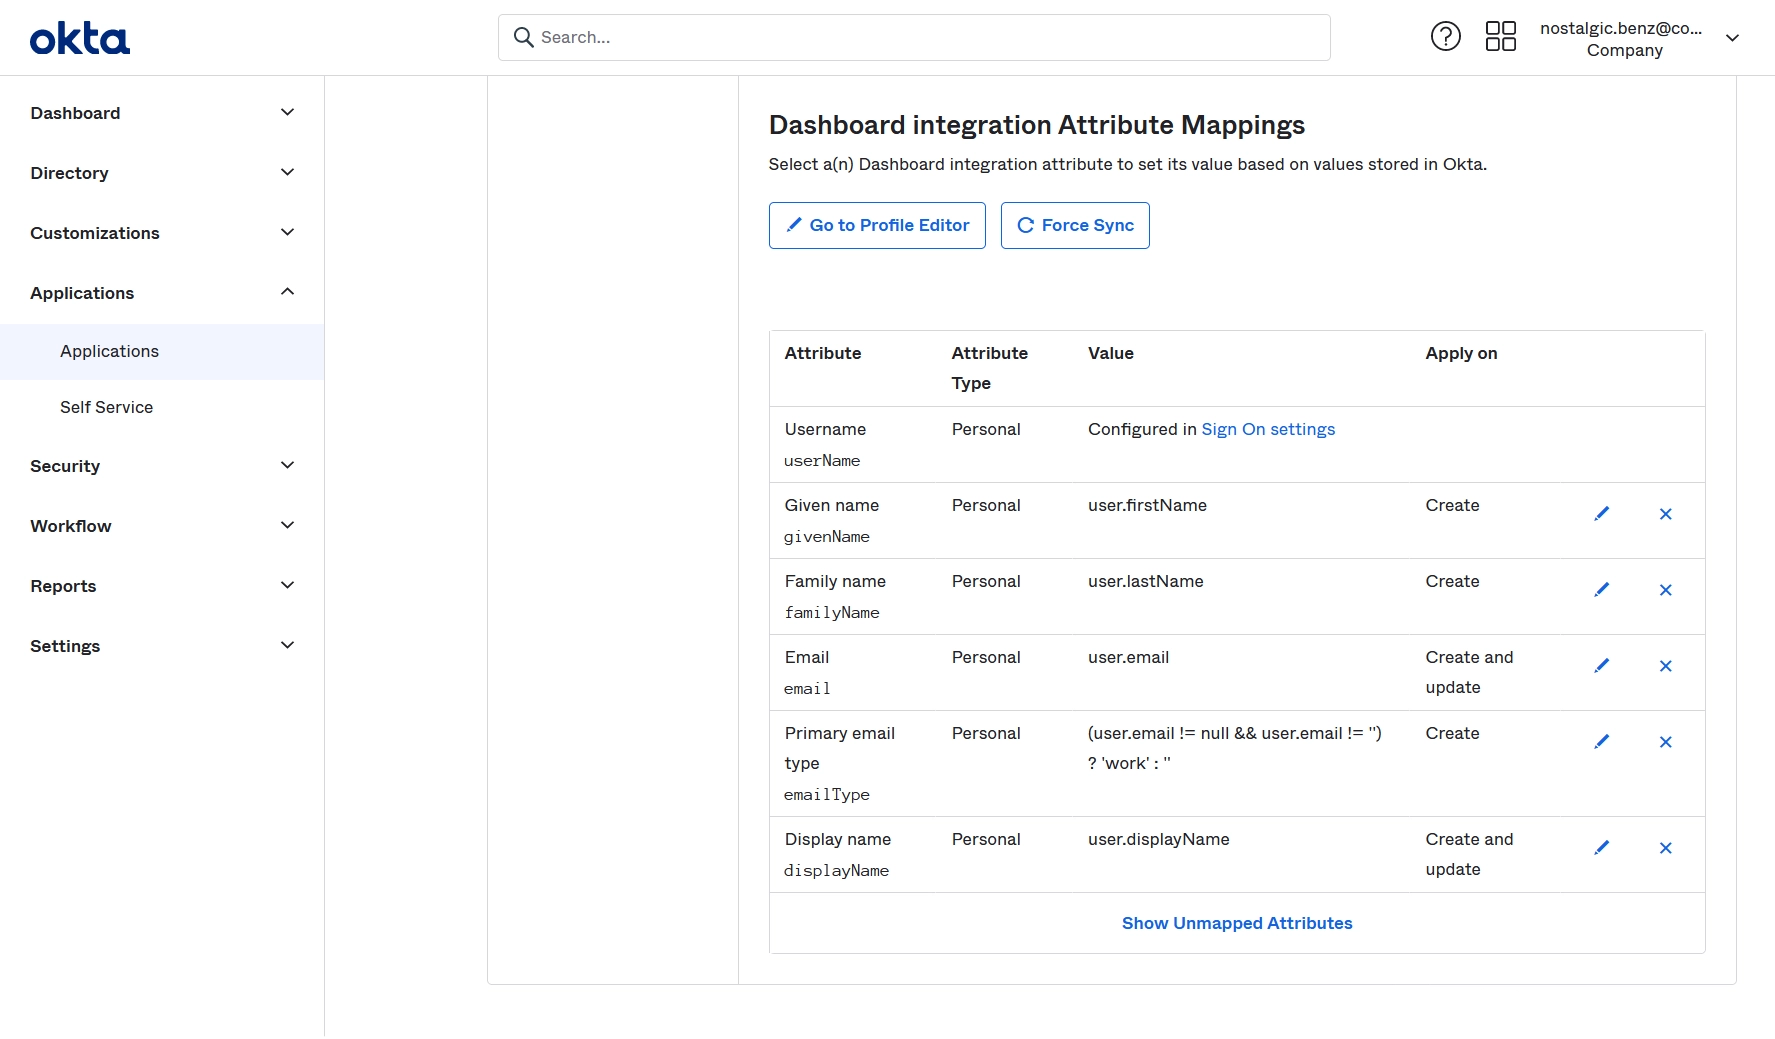
In the Dashboard integration Attribute Mappings group:
Remove all attributes except Username, Given name, Family name, Email, Primary email type, and Display name.
To remove an attribute, click Remove (

) against its name, and then confirm the action.
Edit Given name, Family name, and Primary email type attributes to apply on the Create action.
To edit an attribute, click Edit (

) against its name, edit the attribute details, and then save the changes.