
Overview
Infrascale virtual Backup & Disaster Recovery appliance supports and can be deployed to Hyper-V Server 2008 R2, 2012, 2012 R2, and 2016.
The deployment process consists of the following steps:
| # | Step | Description |
|---|---|---|
| 1 | Choose locations | Choose locations for the virtual appliance hard disks |
| 2 | Create VM | Create a Hyper-V VM without any virtual hard disks |
| 3 | Attach virtual hard disks | Add virtual hard disks to the newly created VM |
| 4 | Configure networking | Select a virtual switch for the virtual appliance and set the static MAC address |
| 5 | Set up appliance | Boot, set up, and configure the virtual appliance for use |
Prerequisites
Before starting the deployment process, consider the following recommended configuration for a Hyper-V server that will host the VM with the virtual appliance.
| Recommended minimum | |
|---|---|
| Processor | 2 cores |
| Memory | 16 GB that is not used by any other VM on the host or the host system itself |
| Disk space | 180 GB for the catalog volume (catalog.vhd)2 TB for the storage volume ( storage.vhd) |
Download the ZIP archive containing the virtual hard disk drives of the virtual appliance, and then unpack the archive to the desired location. (The archive contains three files: boot.vhd, catalog.vhd, and storage.vhd.)
Choose locations
Before going any further, decide where you are going to store the VM and virtual disk (VHD) files.
For optimal performance, there are a number of factors to consider when deciding where to locate the VM and virtual disk files. At a minimum, the files should be stored separately from other VM files to avoid disk contention and other performance degrading issues.
Select location for the VM files
Decide where you want to store the VM files and create a new folder there. The storage device for these files does not need to be very large. But, as mentioned before, try to locate them apart from any other VMs on the server.
Select location for the boot and storage volumes
Decide where you want to store the boot and storage virtual disk (VHD) files and create a new folder there. Remember, select a location that is preferably on a separate physical device from all your other VM disk files. Ideally this device would be a high throughput RAID, or similar. If you do not have an SSD, try to put these disk files on a separate device from where you put the catalog disk files.
Select location for the catalog volume
Decide where you want to store the catalog virtual disk (VHD) file and create a new folder.
If you have an SSD available on the server, this would be an ideal location for the catalog volume since it will see a very high level of traffic.
The catalog volume holds, among other things, the database used by the system for bookkeeping, tracking, and so on, and performance benefits from having low latency to this volume.
Despite you may place the catalog volume on the high performing storage, for example on a low-latency RAID or similar storage device, lately this would lead to quite degraded performance. Thus, we urge you to store the catalog volume on SSD.
Create virtual machine
On your Hyper-V server, open Hyper-V Manager.
Go to Action › New › Virtual Machine.
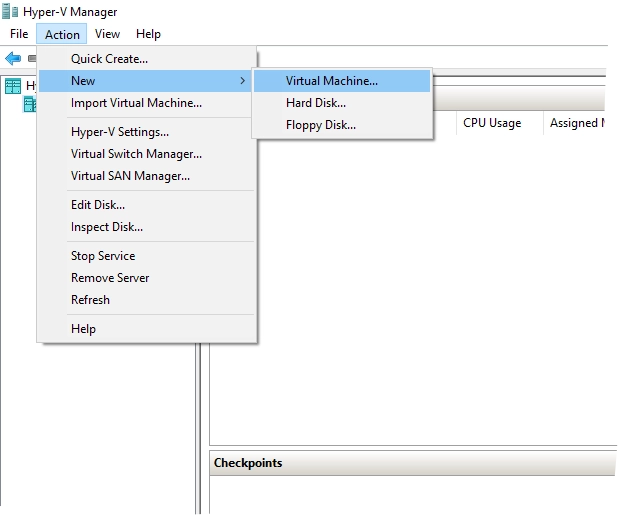
The New Virtual Machine Wizard opens.
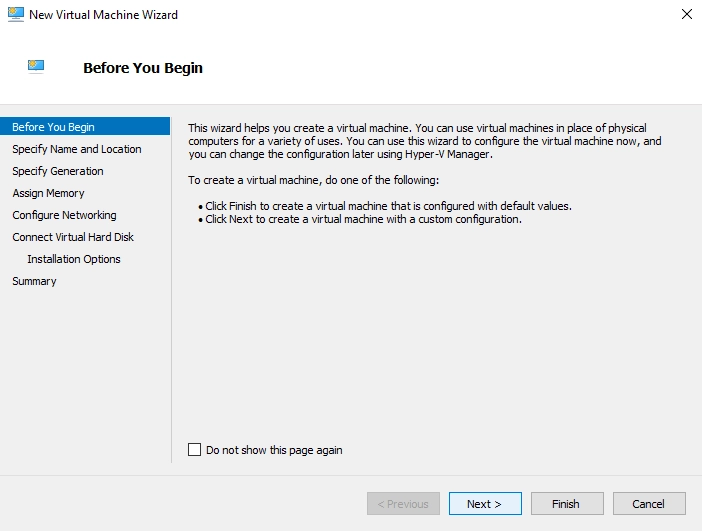
In the Before You Begin step, click Next.
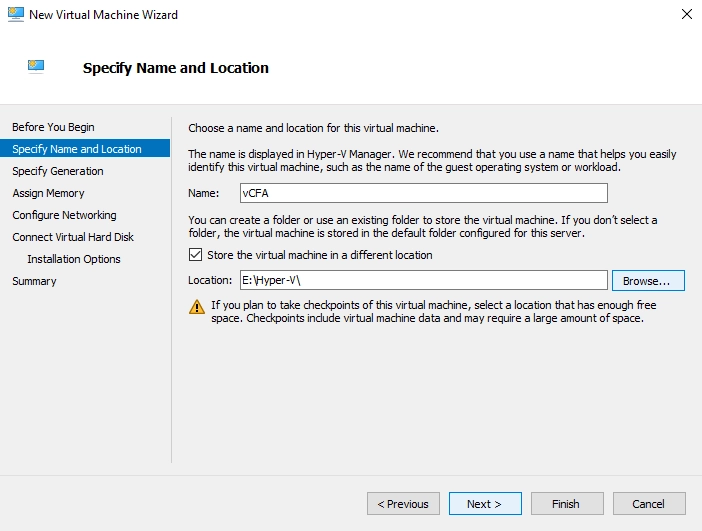
In the Specify Name and Location step:
In the Name box, enter the VM name.
Select Store the virtual machine in a different location, click Browse, and then select where you want to store the VM files.
Click Next.
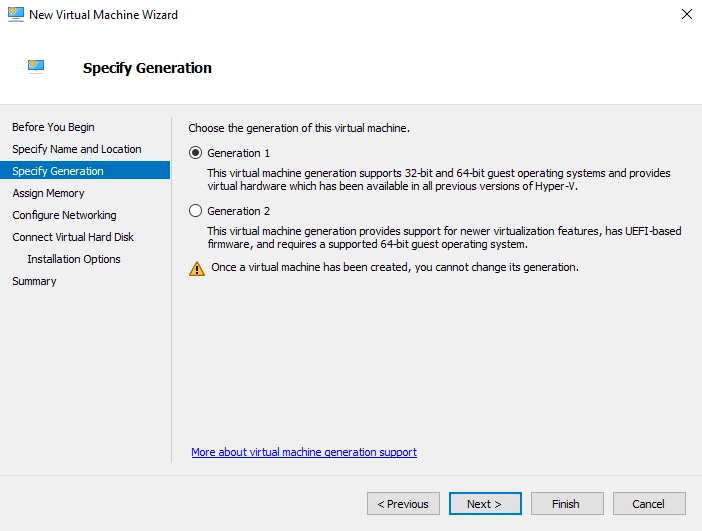
In the Specify Generation step, select Generation 1, and then click Next.
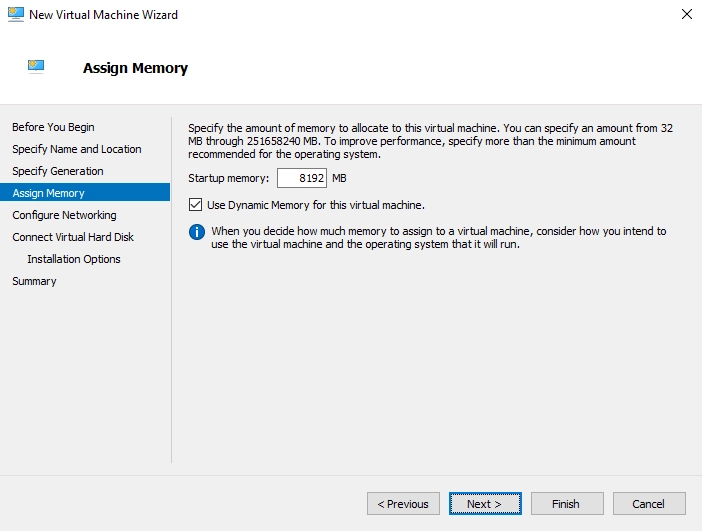
In the Assign Memory step:
In the Startup memory, specify the amount of memory to allocate to the VM (recommended is 16 GB).
Select Use Dynamic Memory for this virtual machine.
Click Next.
In the Configure Networking step, select a virtual switch the VM will use for network connection.
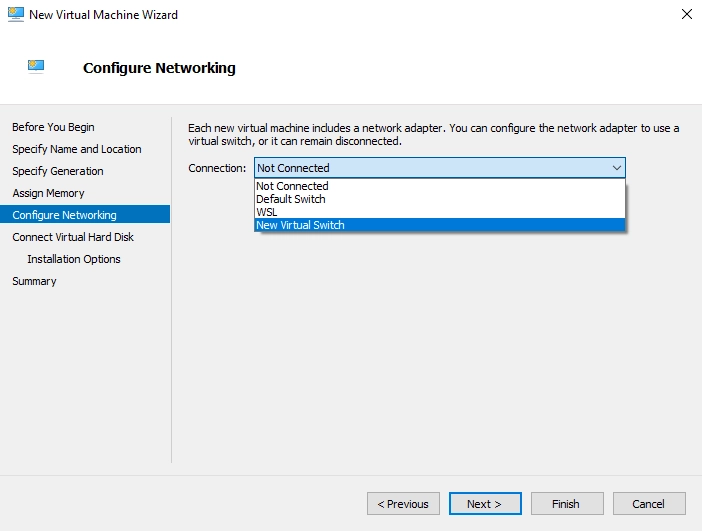
You can select Not Connected and configure networking later.
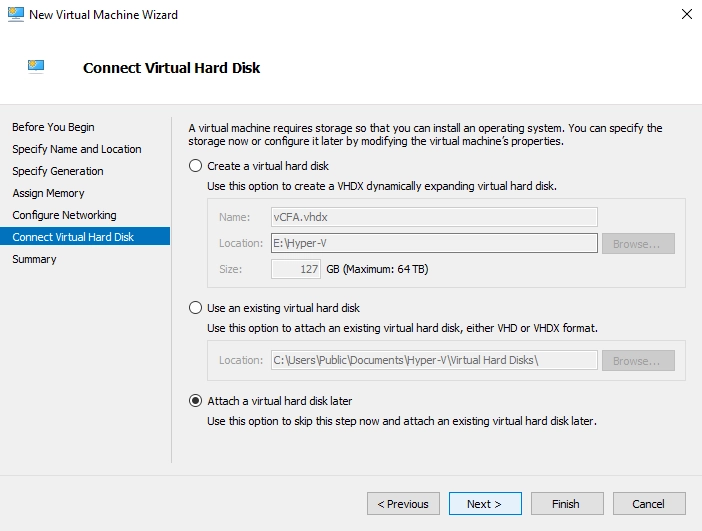
In the Connect Virtual Hard Disk, select Attach a virtual hard disk later, and then click Next.
In the Summary step, review the settings of the VM, and then click Finish.
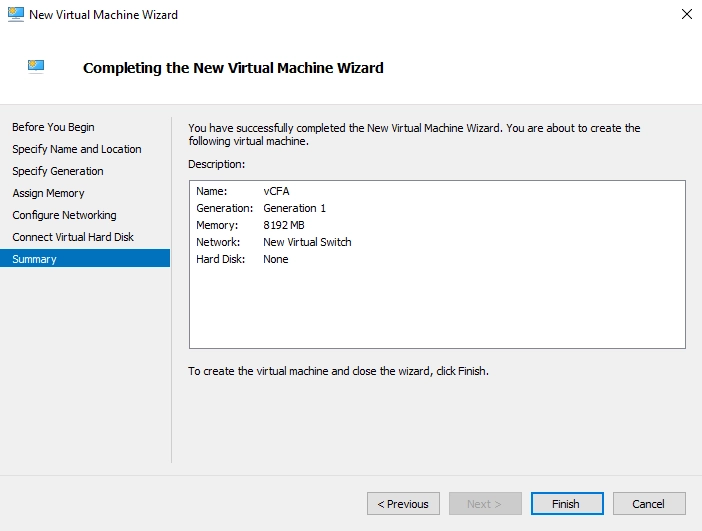
The system creates the VM and shows it in the list of VMs in Hyper-V Manager.
Attach virtual hard disks
In Hyper-V Manager, right-click the newly created VM, and then click Settings.
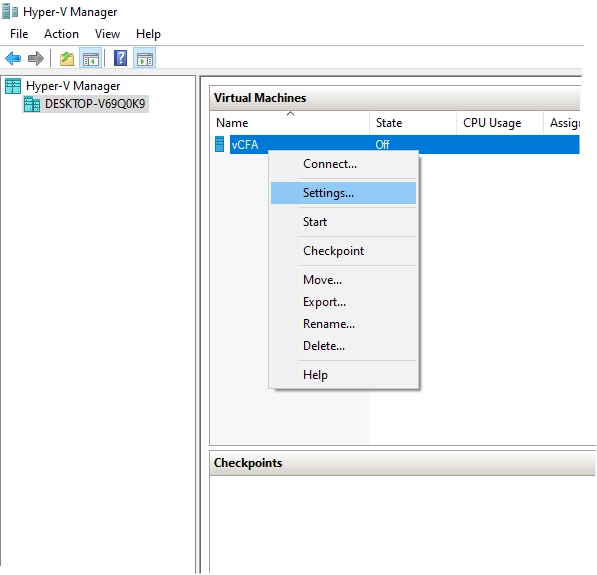
The VM settings dialog opens.
Attach virtual hard disk for booting:
On the left pane, in the Hardware group, select IDE Controller 0.
On the right pane, in the IDE Controller group, select Hard Drive, and then click Add.
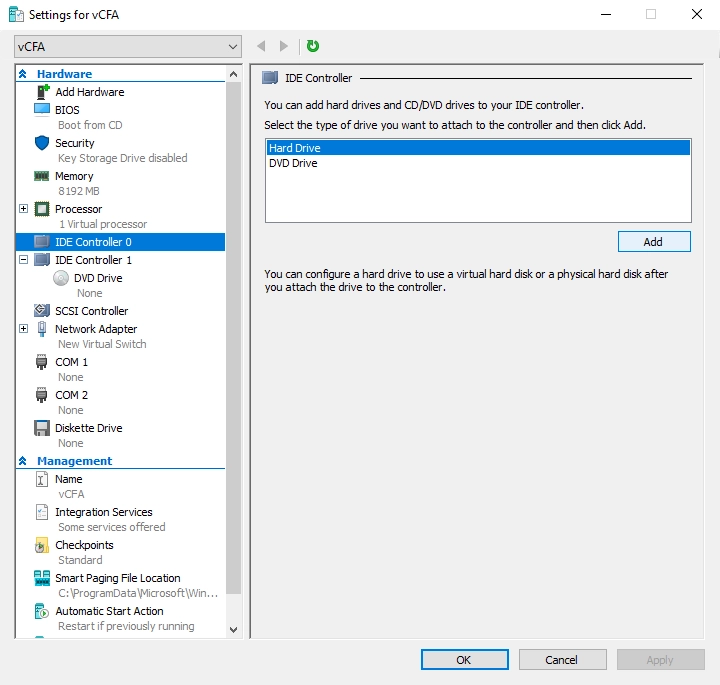
On the right pane, in the Media group, select Virtual hard disk, and then click Browse.
Find and select the boot virtual hard disk file (
boot.vhd).Click Apply to save changes.
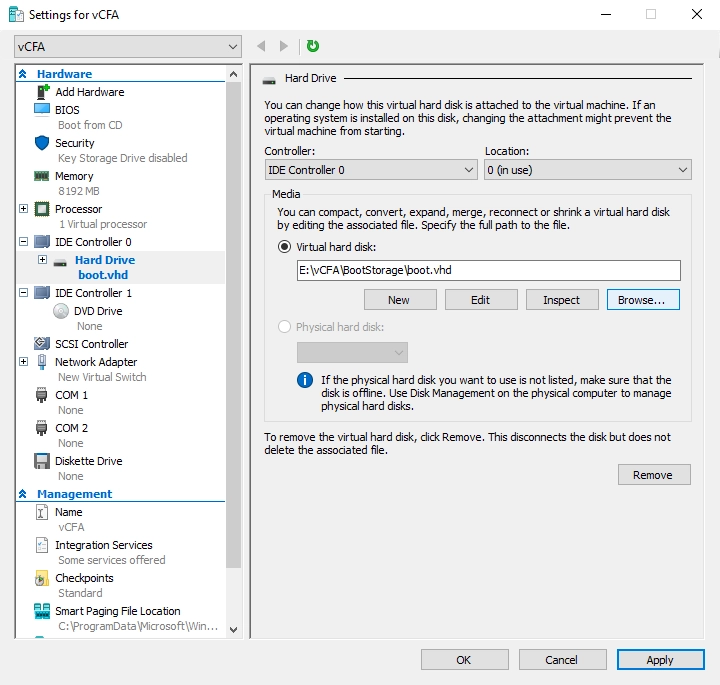
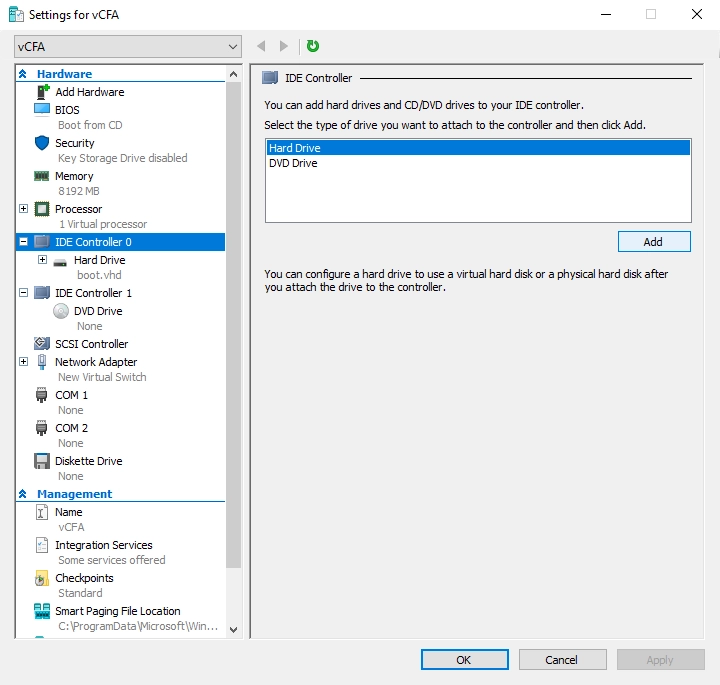
Hyper-V Manager attaches the virtual hard disk for booting to the VM.
Attach virtual hard disk for storage:
On the left pane, in the Hardware group, select IDE Controller 0.
On the right pane, in the IDE Controller group, select Hard Drive, and then click Add.
On the right pane, in the Media group, select Virtual hard disk, and then click Browse.
Find and select the storage virtual hard disk file (
storage.vhd).Click Apply to save changes.
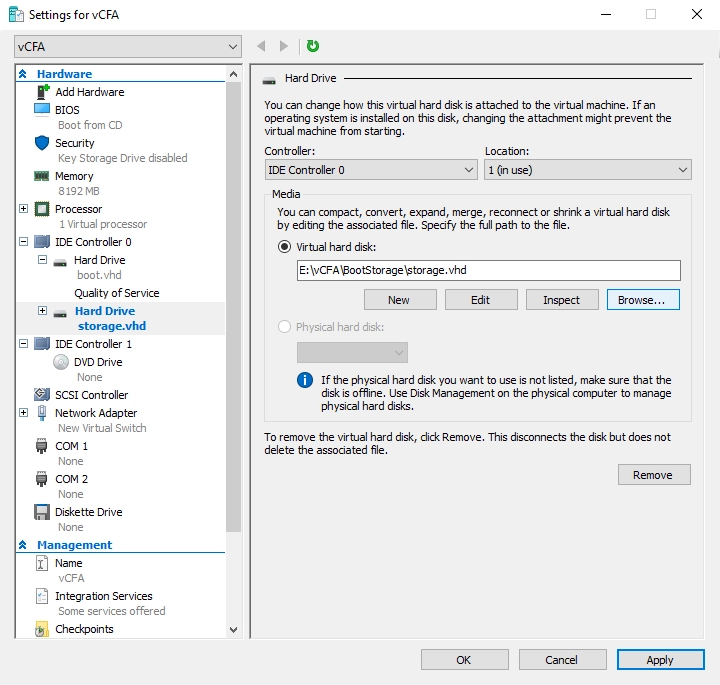
Hyper-V Manager attaches the virtual hard disk for storage to the VM.
Attach virtual hard disk for catalog:
On the left pane, in the Hardware group, select IDE Controller 1.
It is recommended to have maximum of two virtual hard disks per controller. Thus, use IDE Controller 1 to attach the virtual hard disk for catalog.
On the right pane, in the IDE Controller group, select Hard Drive, and then click Add.
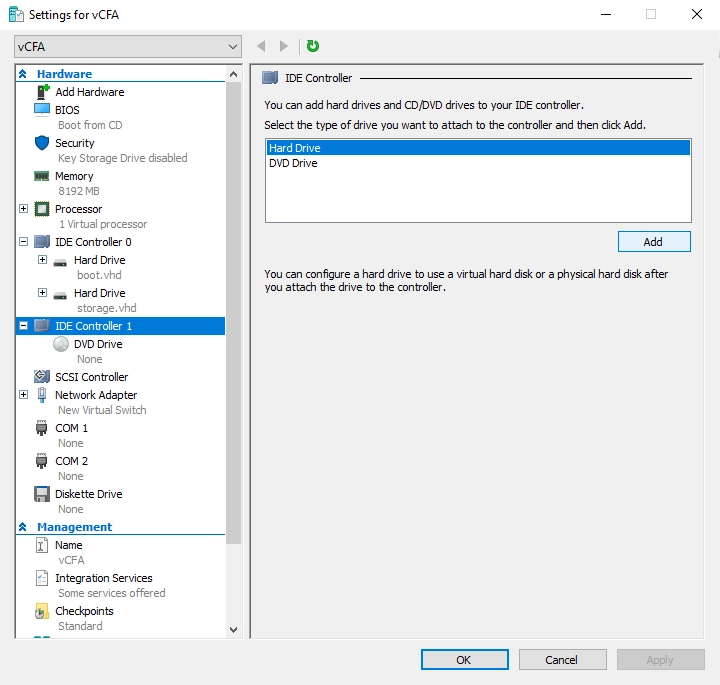
On the right pane, in the Media group, select Virtual hard disk, and then click Browse.
Find and select the storage virtual hard disk file (
catalog.vhd).Click Apply to save changes.
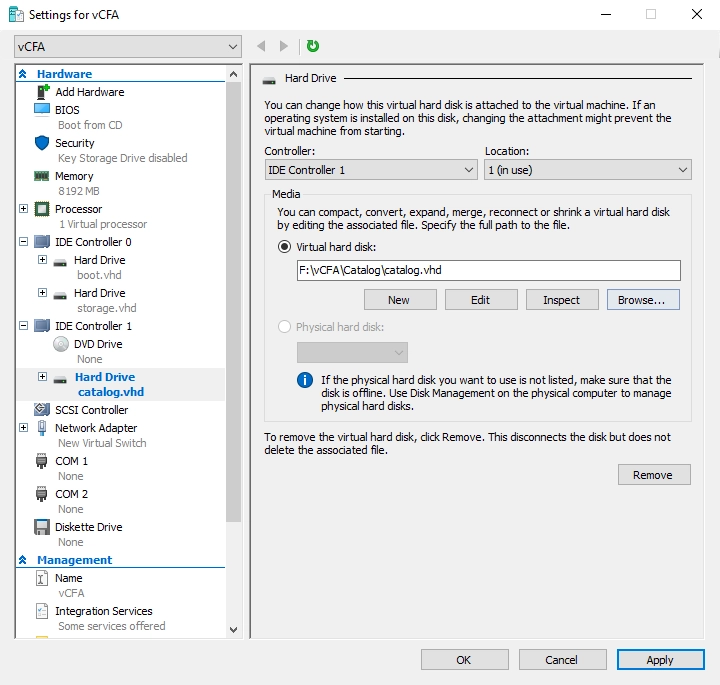
Hyper-V Manager attaches the virtual hard disk for catalog to the VM.
Configure networking
Select virtual switch for the VM.
For more information about Hyper-V virtual switches, see the Hyper-V documentation.
To add a virtual switch to the VM:
In Hyper-V Manager, right-click the VM, and then click Settings.
The VM settings dialog opens.
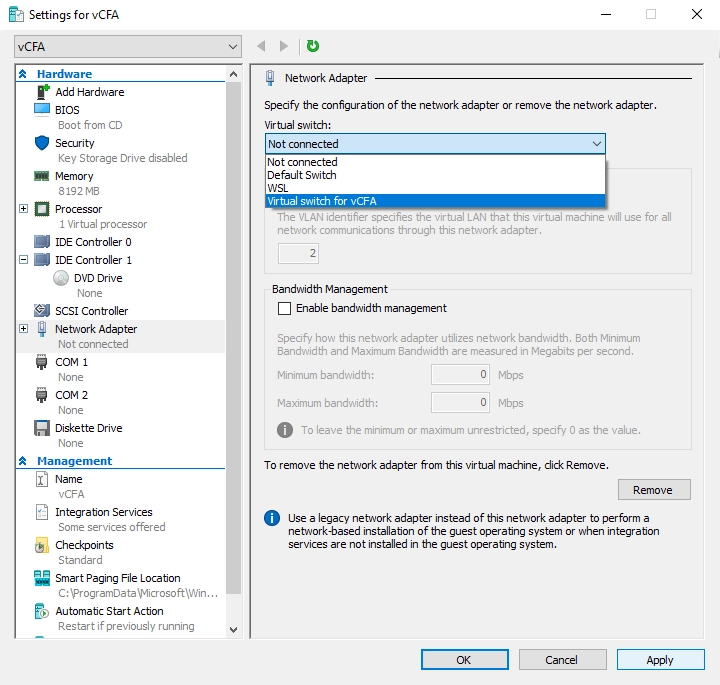
In the left pane, in the Hardware group, select Network Adapter.
In the right pane, in the Virtual switch drop-down list box, select a virtual switch the virtual appliance will use for network connection.
Click Apply to save changes.
Set static MAC address.
If the VM has a dynamic MAC address, your Hyper-V server assigns it automatically, and may change it in future. When MAC address of the VM changes, network settings of the virtual appliance … To avoid this, you should set a static MAC address for the VM. For this:
In Hyper-V Manager, right-click the VM, and then click Settings.
The VM settings dialog opens.
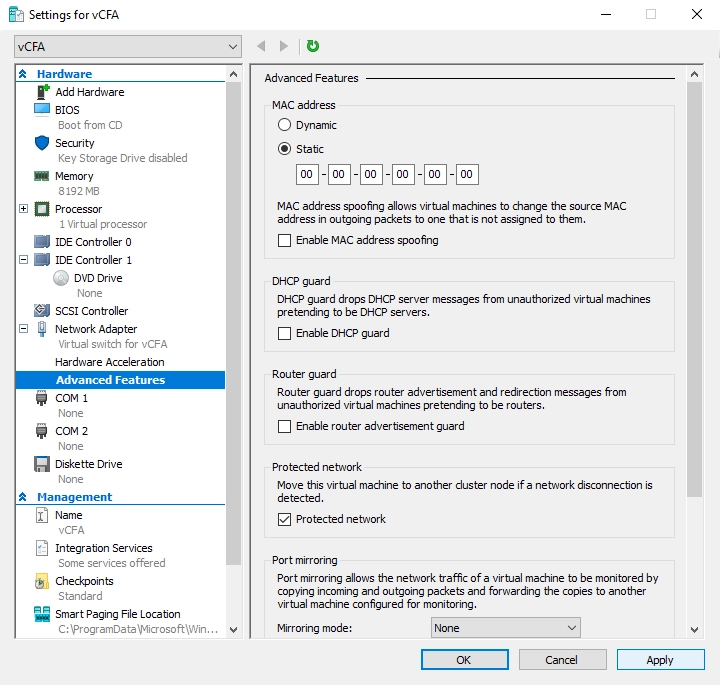
In the left pane, in the Hardware group, expand Network Adapter, and then select Advanced Features.
In the right pane, in the MAC address group, select Static, and enter a new MAC address.
MAC address must be unique and must not conflict with other systems on your network.
Click Apply to save changes.
If you add a network interface controller to the virtual appliance later, make sure to assign it a unique static MAC address.
Set up appliance
After you created and configured the VM, boot it and set up the virtual appliance as follows:
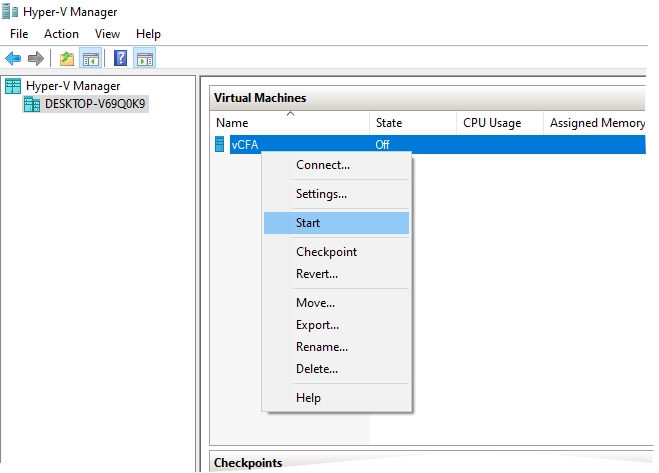
In Hyper-V Manager, right-click the VM, and then select Start.
In your browser, enter IP address of the virtual appliance, and then log in to the Management Console with the default credentials: username –
admin, password –rvxd2d2d.On the Welcome tab, you will see 3 groups of disks.
On the left is a list of available drives that have not been assigned, and on the right is a list of storage disks, and catalog disks.
Select the larger disk on the left, and then click the right arrow (
>>) next to the Storage Disks group to assign that disk as a storage one.Select the smaller disk on the left, and then click the right arrow (
>>) next to the Catalog Disks group to assign that disk as a catalog one.Storage disks are used to store backup data, and catalog disks are used for the databases to manage backup jobs and deduplicated data.
Click Next, review the storage configuration settings, and then click Finish.
After you click Finish, the virtual appliance will reboot. During this boot the disks are formatted, and the deduplicated storage is created. This can take some time, but do not turn off or restart the virtual appliance until this finishes. Once the virtual appliance has finished booting, log in to the Management Console again.
Complete the Quick Start Wizard to initially configure the virtual appliance and start using it.