Restore a Microsoft Hyper-V virtual machine
This section assumes that the version of the Backup & Disaster Recovery appliance firmware is 8.5 or later, version of the DR backup agent installed on the Hyper-V host is 8.5 or later, and Hyper-V host client uses the standard DR engine.
Infrascale Backup & Disaster Recovery allows you to restore virtual machines (VMs) to the same or to a different Hyper-V server connected to appliance.
Also, you can restore VMs to a host with Hyper-V Server version different from the one they were backed up from, according to the following restore compatibility matrix:
| Source Hyper-V version | Target Hyper-V version |
| 2012 R2 | 2012 R2, 2016, 2019 |
| 2016 | 2016, 2019 |
| 2019 | 2019 |
| 2022 | 2022, 2025 |
| 2025 | 2025 |
To restore a Hyper-V VM:
In the appliance Management Console, go to Clients › Hyper-V (or to Clients › Summary).
Select a Hyper-V VM to restore.
Click Restore on the actions toolbar, or right-click the selected VM, and then click Restore in the context menu.
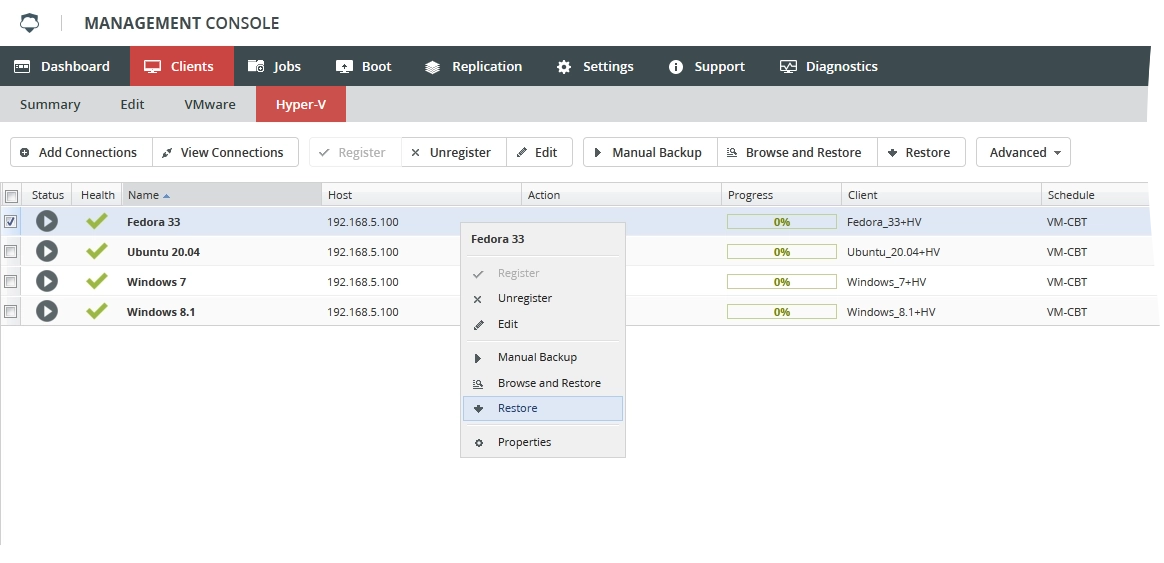
The Restore Virtual Machine dialog opens.
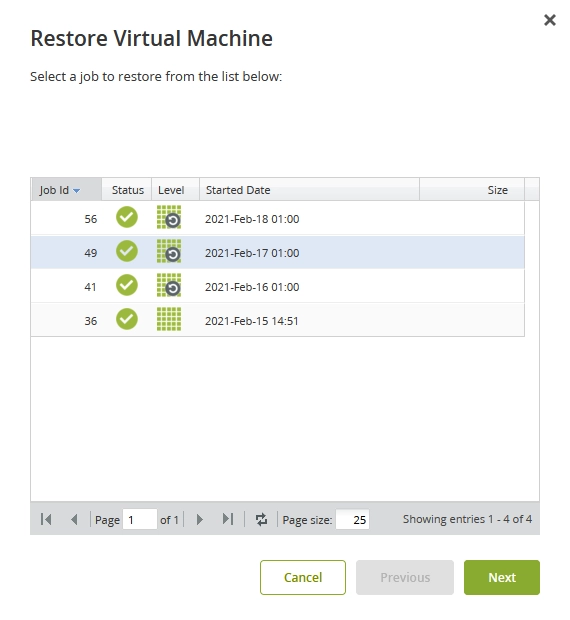
In the open dialog, select a backup job to restore the VM from, and then click Next.
Select a Hyper-V host to restore the VM to, and then click Next.
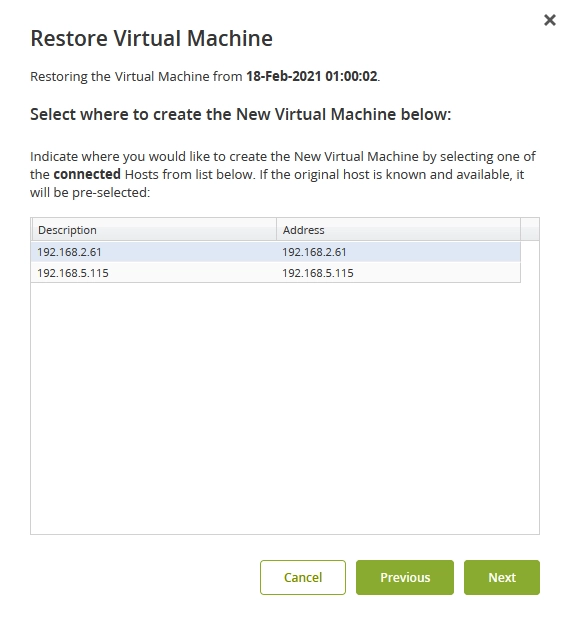
If the intended target Hyper-V host is missing from the list, make sure it is connected to appliance.
If network switch configurations of the VM and the target host mismatch, you need to review network configuration, and to make necessary adjustments.
Map virtual switches of the VM to virtual switches available on the target host, and then click Next.

Specify the paths to restore VM disks and configuration files to, and then click Next.
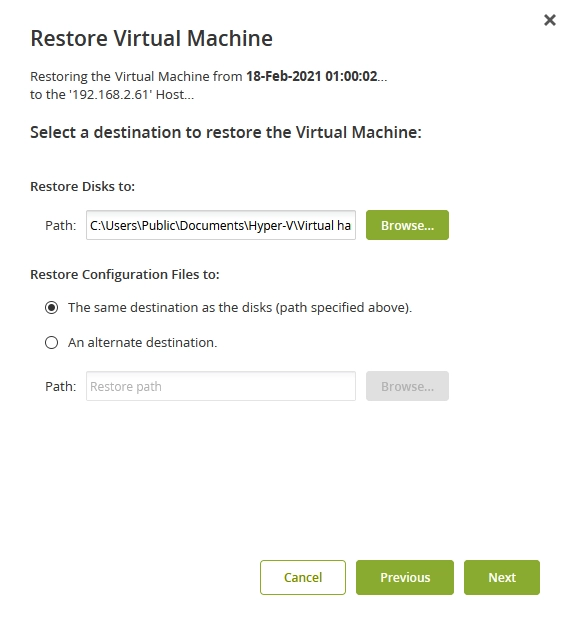
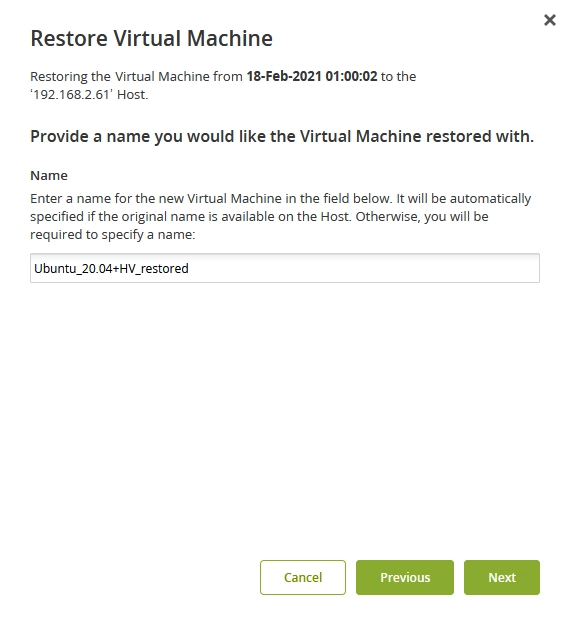
Specify the name of the VM, and then click Next.
Review the restore settings and details, and select if you want to immediately power on the VM after it is restored.
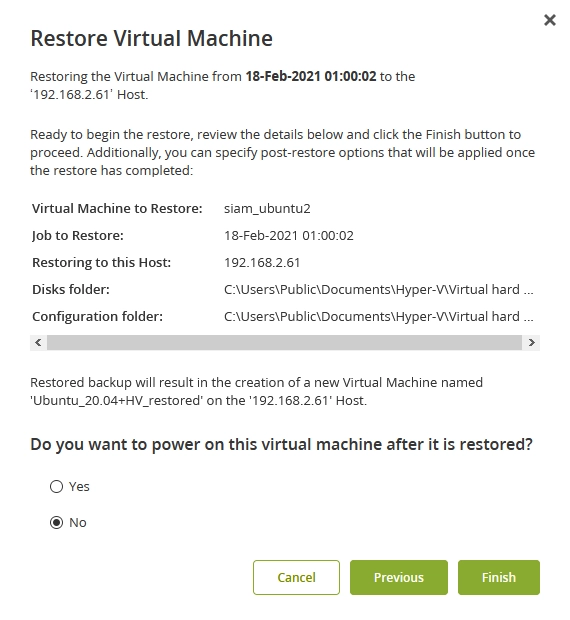
Click Finish to start restoring.
You can view the VM restore progress and status in Clients › Hyper-V, and in Jobs › Active Jobs.
